Lets integrate our SDK in few minutes
SDK UIKit for iOS#
With MirrorFly UIKit for iOS, you can easily build an in-app chat with all the essential messaging features.
The MirrorFly UIKit for iOS is now available for you to build and customize views at a component level through modularization.
UIKit allows you to execute key chat functions using a view controller, which is composed of a module and a view model. While the module creates and displays the UI, the view model processes and updates relevant data from Chat SDK in each view. The view controller acts as the fundamental starting point of UIKit by allowing you to create and manage your UI.
Requirements#
The minimum requirements for Chat SDK for iOS
- Xcode 15.0 or later
- iOS 13.0 or later
- Swift 6.0 or later
Things to be Noted Before Making a Start#
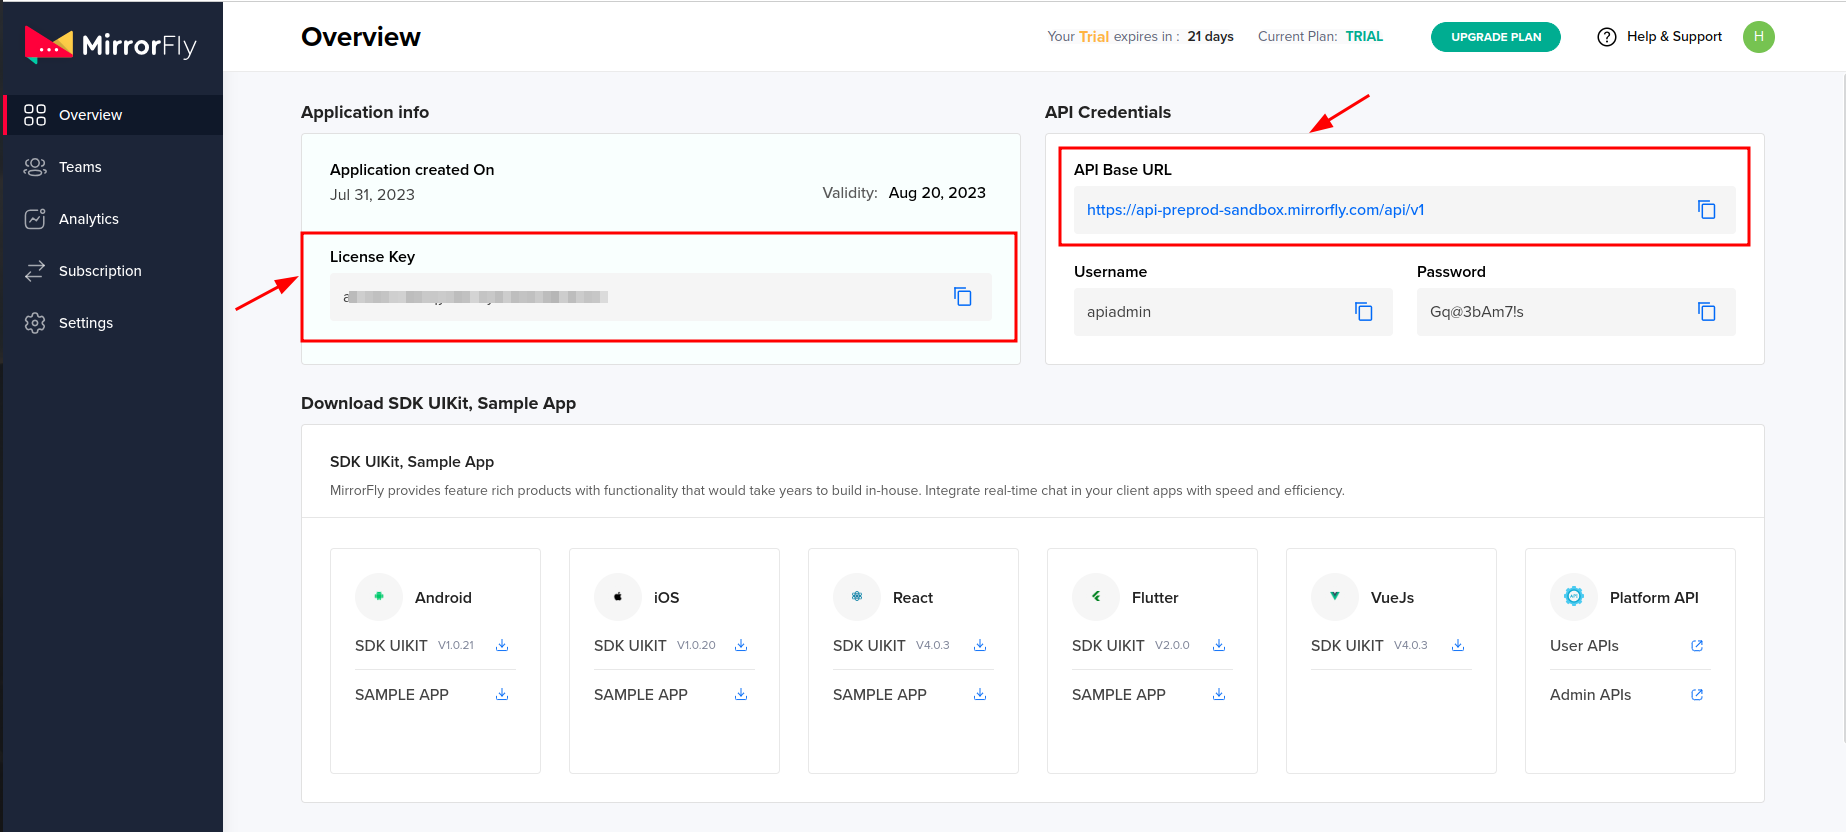
SDK License Key#
Note : Before proceeding with CONTUS MirrorFly Chat SDK integration, there must be an SDK license key that needs to be obtained for your MirrorFly application.
To get the License Key,#
Step 1: Register here to get a MirrorFly User account. Registration is subject to verification and would take up to 24 hours.
Step 2: Login to your Account
Step 3: Get the License key from the application Info’ section
Get Started#
You can start building a messaging experience in your app by installing MirrorFly UIKit.
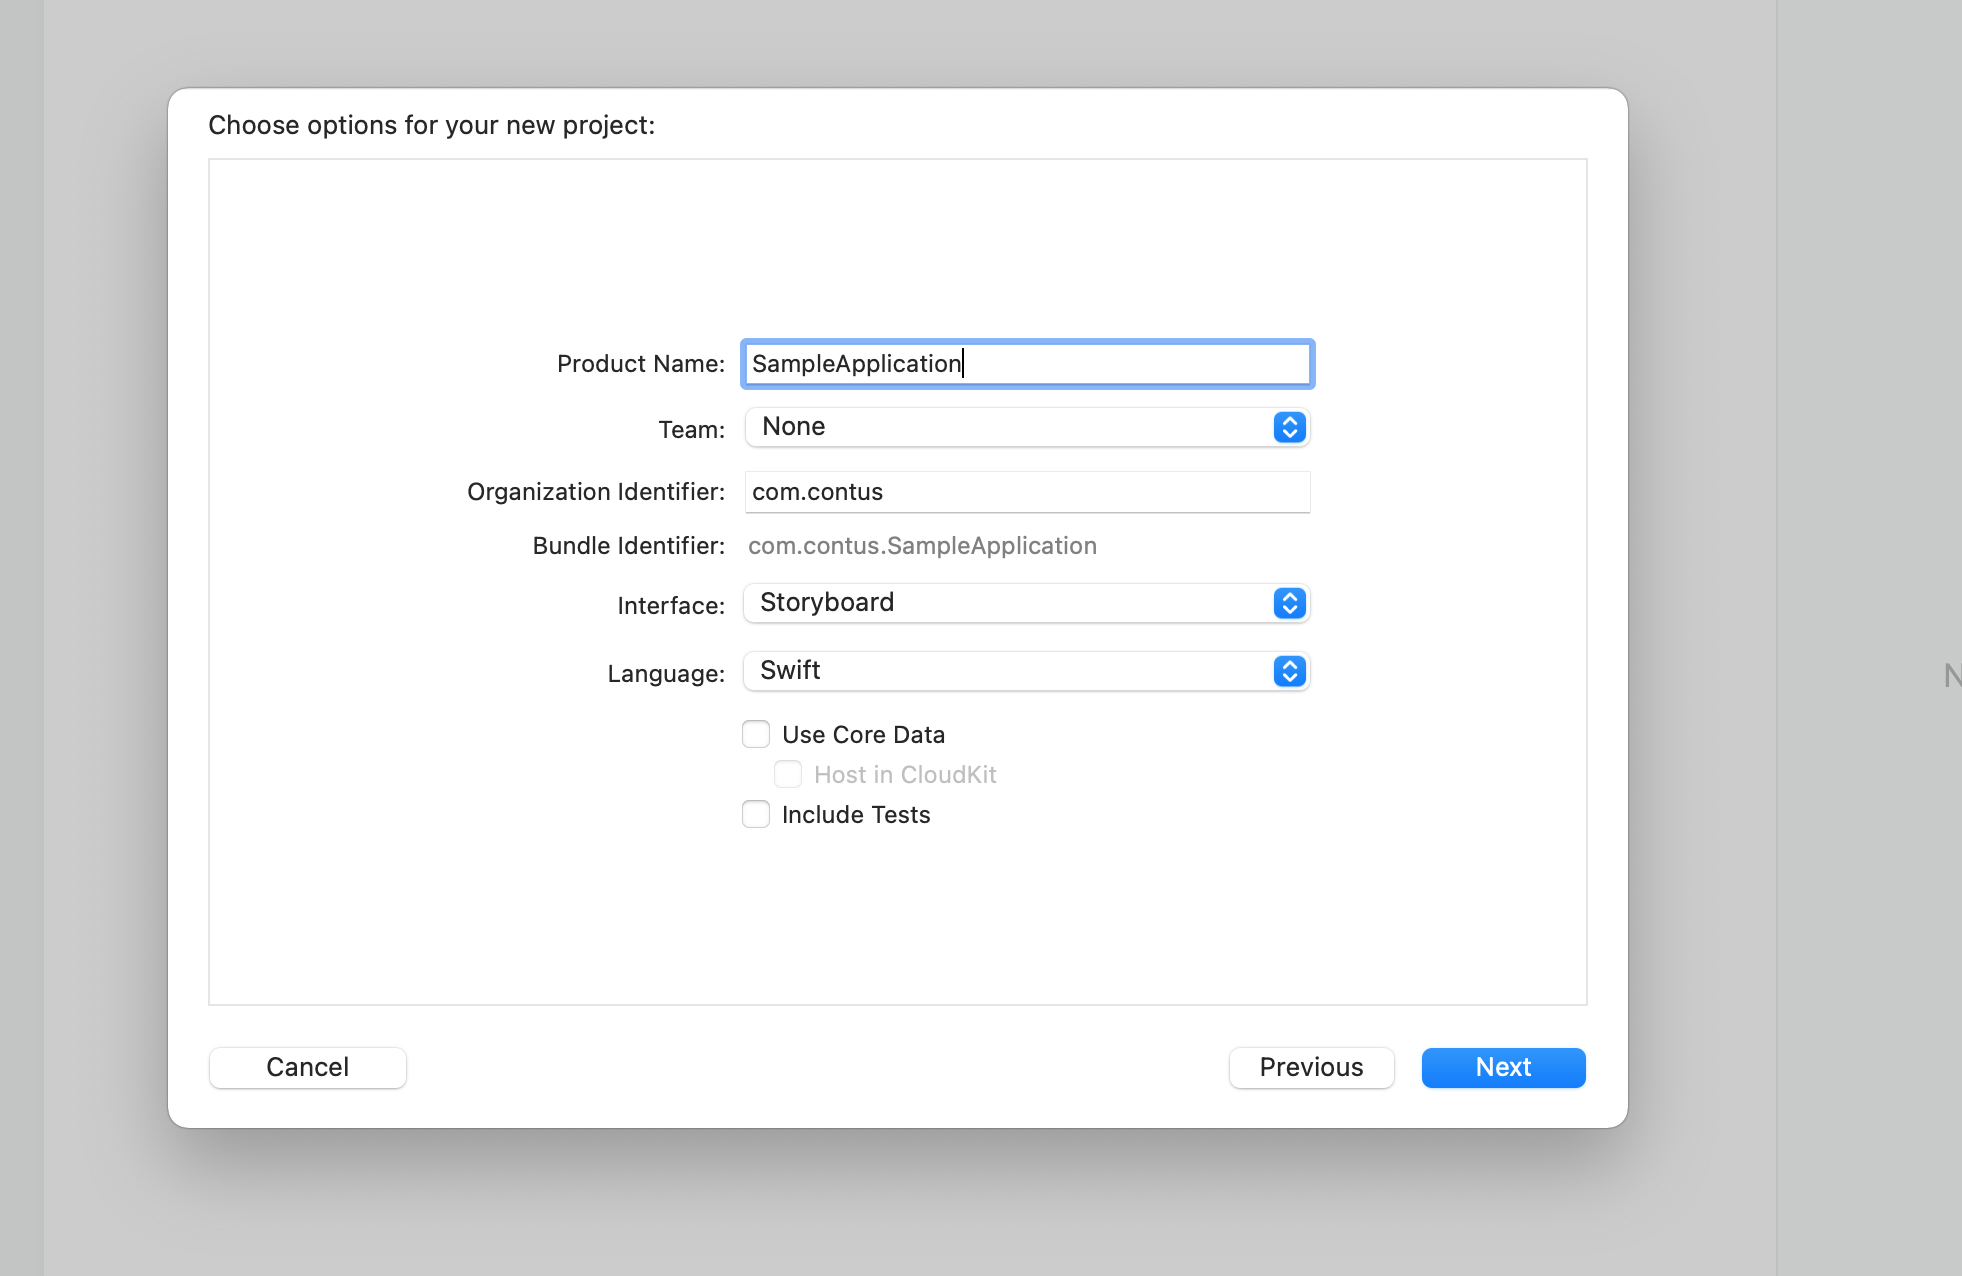
Step 1: Create a Project
To get started, open Xcode, create a new Swift Project
Step 2: If you have not initiated any pods project before, then initiate the one. Now, add the required pods that are necessary for the SDK to execute the process perfectly.
Add the below given pod hook code block at the end of the pod file and thus, finally install the pods.
Step 3: Adding Photo library usage description to your info.plist

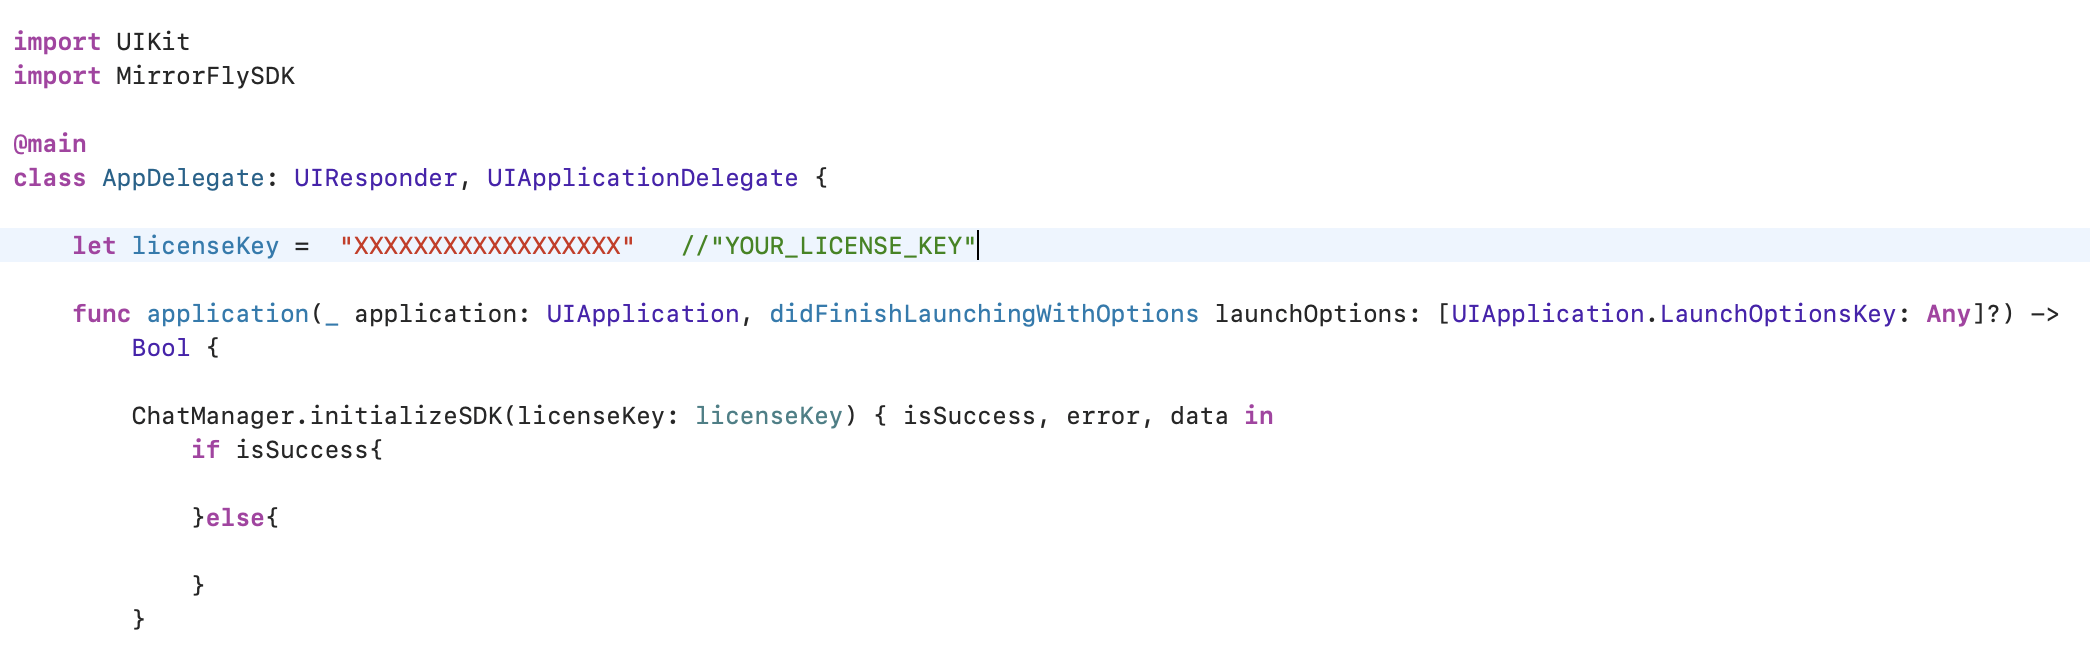
Step 4: Initialize with License Key
You can copy the license key from the 'Overview’ section in the Console dashboard.
To integrate and run Mirrorfly UIKit in your app, you need to initialize it first. Initialize the MirrorFlyUI instance through your view controller.
Note : Use below to configure SDK in AppDelegate.
Initialize ChatSDK#
Add the following import statement below before accessing SDK anywhere in your project.
In appdelegate didFinishLaunchingWithOptions function add SDK initialize method with valid Licensekey
Note : Use below method to initialize in ViewController.
Initialize UIKitSDK#
Add the following import statement below before accessing UIKitSDK anywhere in your project.
Note :
FlyUIKitConstants.IS_CALL_ENABLEDshould be set to true if the user wants to avail the call feature along with the chat feature, elseFlyUIKitConstants.IS_CALL_ENABLEDshould be set to false to avail the chat feature alone.
The initialisation should be done with the parameters as below
| Argument | Type | Description |
|---|---|---|
| userID | String | Unique UserID of the User |
| isExport | Bool | true for production(apns certificate) builds and false for sandbox(apns certificate)builds |
| isChatHistoryEnable | Bool | true To enable chat history and false for normal chat |
| CALLBACK | Completion Handler used to observe the action status with arguments as result - String, error - String | |
| userName | String | Name of the registered user |
| userEmail | String | Email of the registered user |
| userProfileImage | String | ProfileImage of the registered user |
Step 5: Displaying RecentChat List
MFUIRecentChatListViewController is the starting point for launching UIKit in your app. Using the below code, you can fetch the complete list of the Recent Chats.
Note : If you need to navigate directly to Chatview, Use the below method
navigateToChatView()instead ofgetRecentChat()
MFUIChatViewParentController is the starting point for launching UIKit in your app. Using the below code, you can fetch the particular Chat view details.
Note : UIViewcontroller must embedded with UINavigationController.
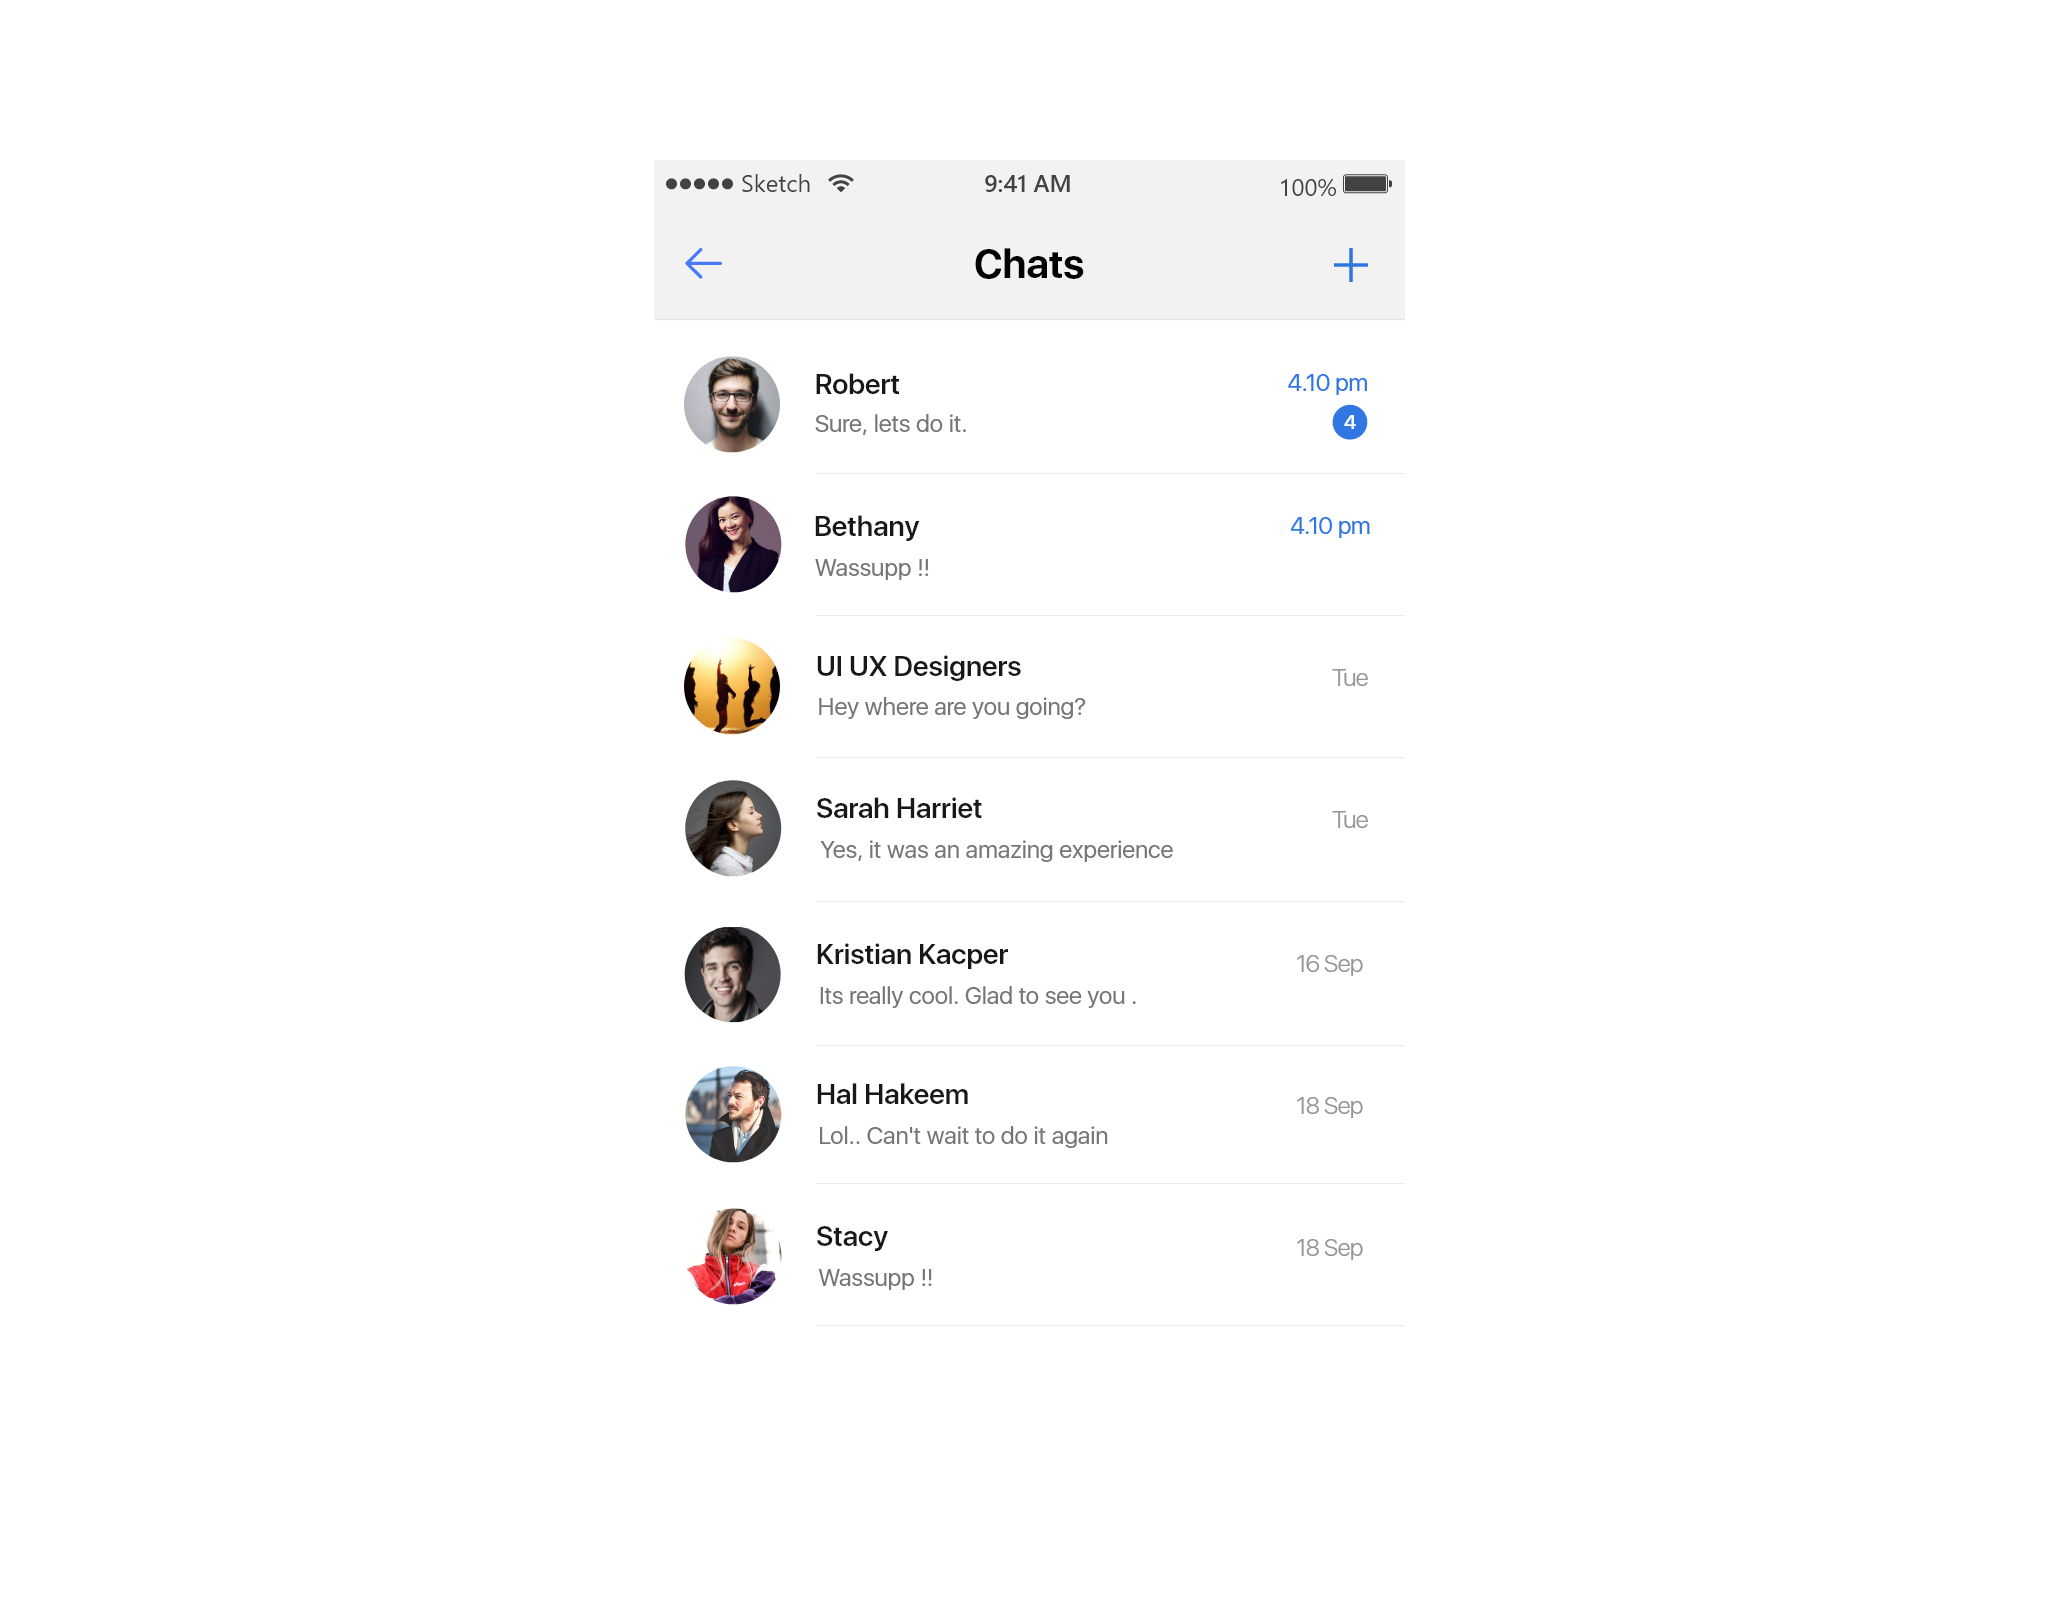
Step 6: Send Your First Message
You can now run the app on a simulator or a plugged-in device. To send a message, you must first create a chat either single or group chat by tapping the icon in the top-right corner.
After the slection of the chat type, the app lands into the Contacts page with the all the registered users using the same license key. Then, you can select users you wish to start your chat with. Once the chat room has been created, enter your first message and send.
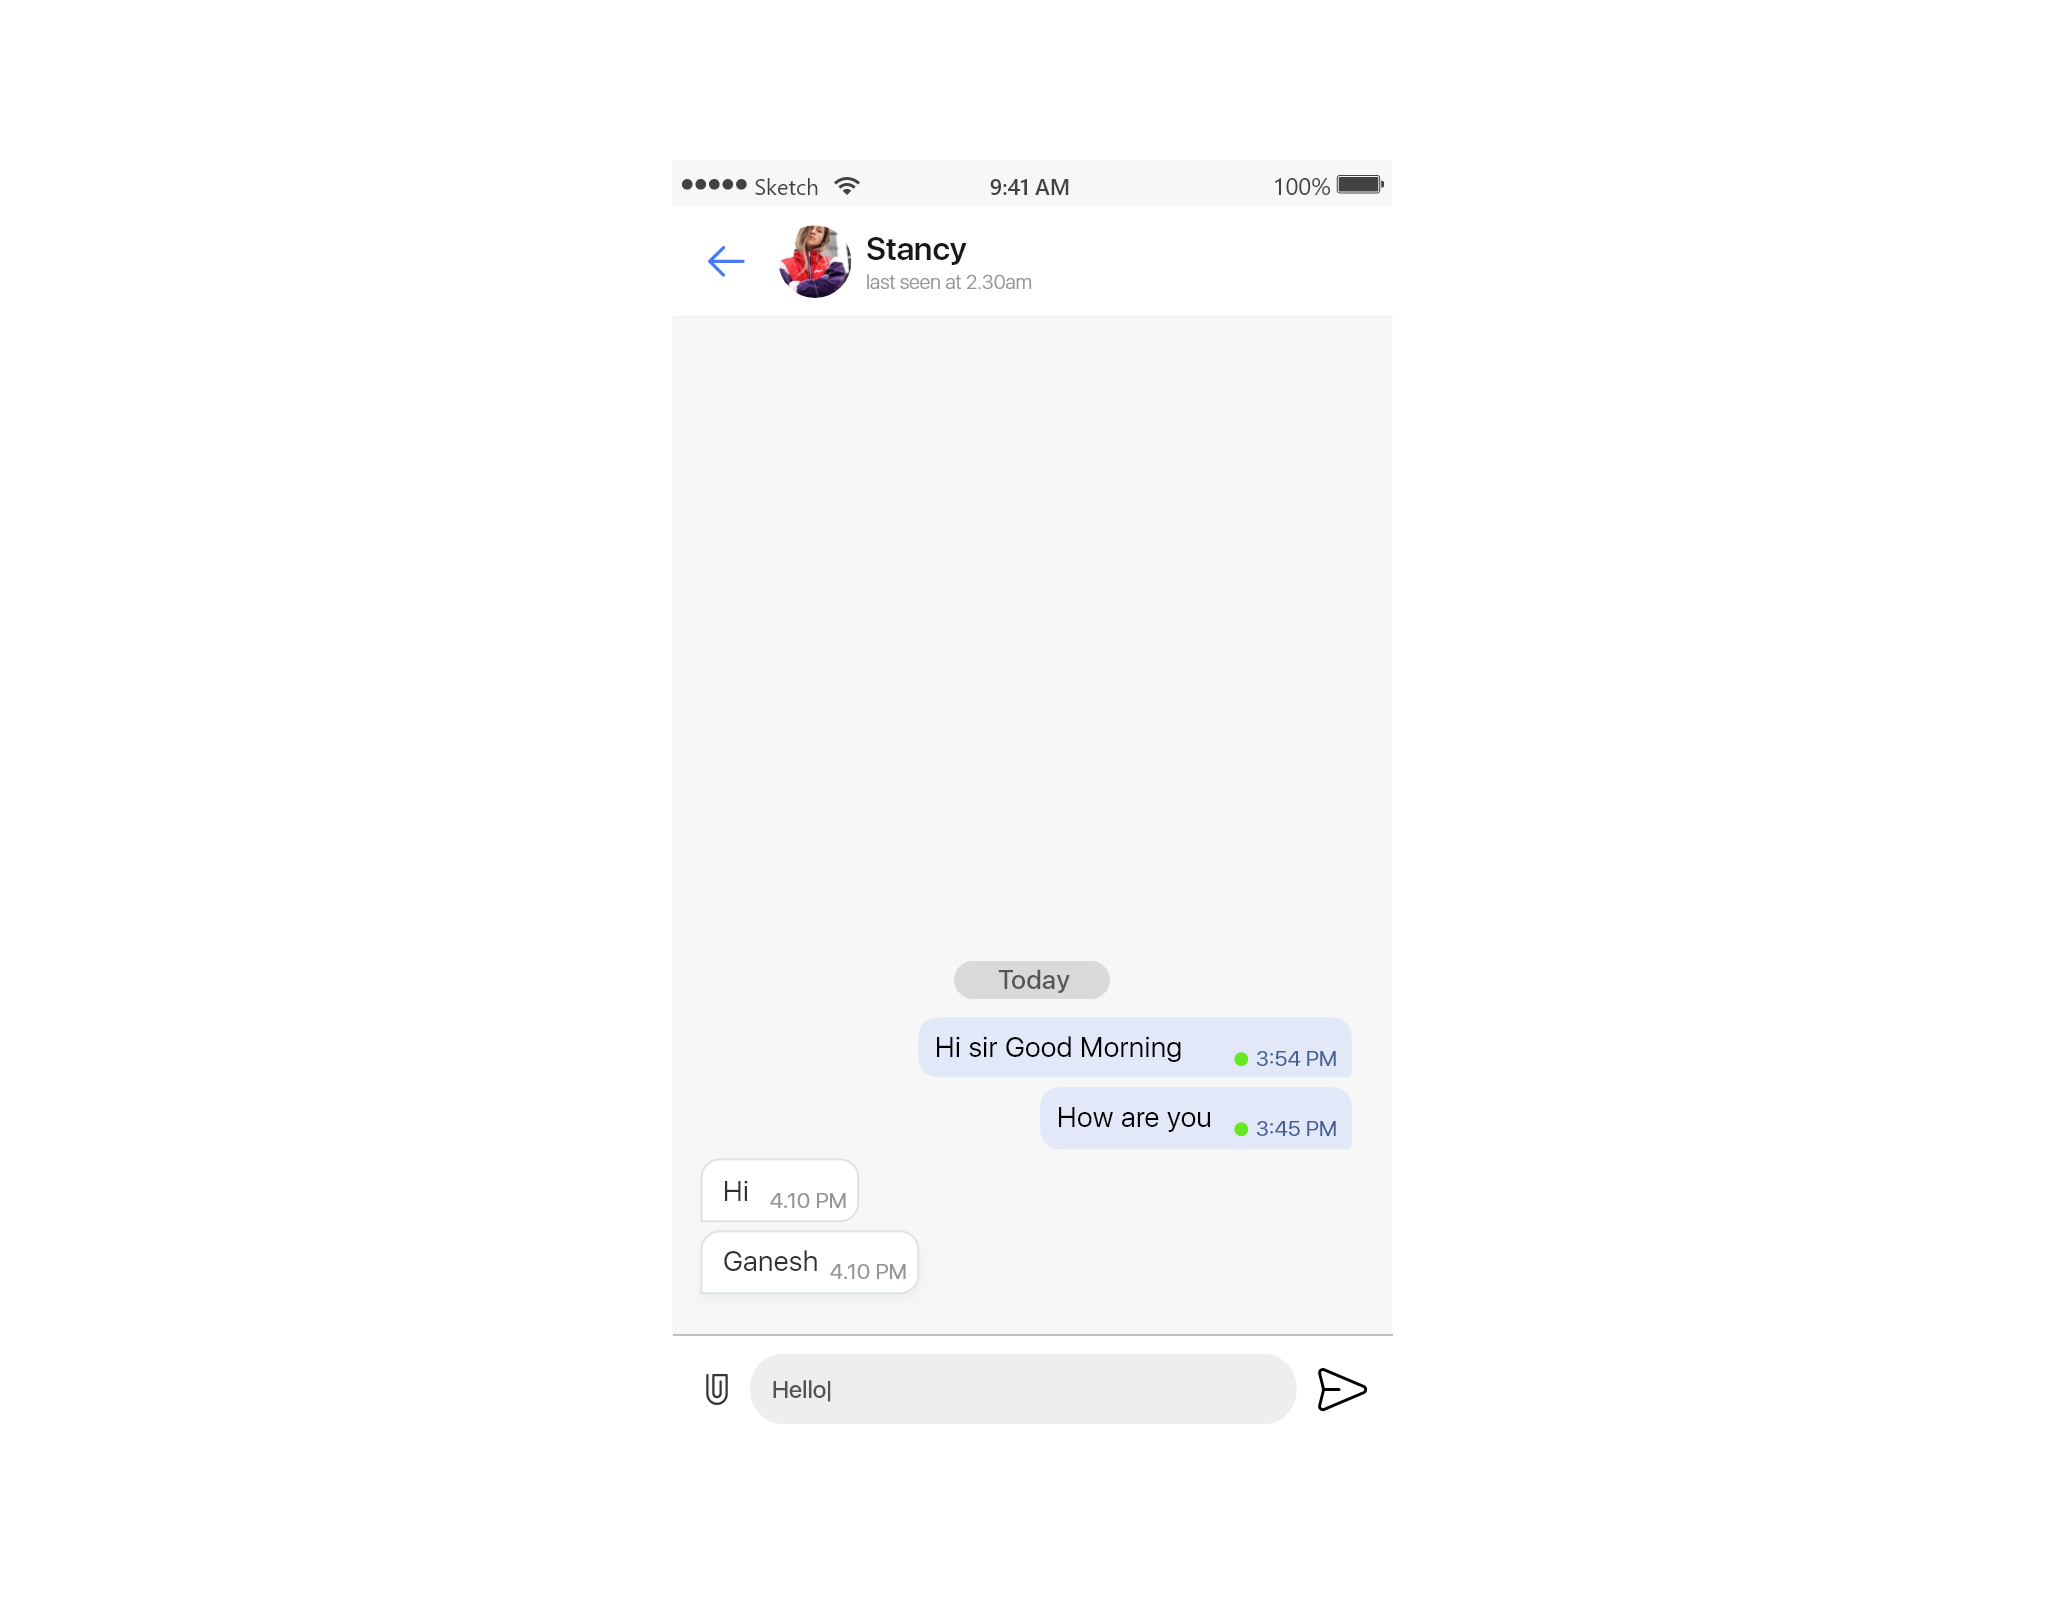
You've successfully sent your first message with MirrorFly.
Note : Great!!! We are now end of the Quick Start section. For Basic with various module navigation.Click here