

This article guides you through building highly interactive chat app interfaces by integrating ready-to-use UI components, layouts, and templates.
The target development environment will be iOS and the coding language will be Swift. This guide will demonstrate UI implementation using MirrorFly’s pre-built UI kits.
What You’ll Need
To create user interfaces in an iOS chat app, you’ll need the following prerequisites:
- Xcode 13 or later
- iOS 12.1 or later
- Swift 5.0 or later
Section 1
Download the UI Kits
To add custom themes, fonts, and colors into your chat apps, you’ll need to integrate pre-built UI kits to your apps. You can download it from your existing MirrorFly account. If you do not have a MirrorFly account, follow the upcoming steps:
Step 1: Create an account with MirrorFly
- Go to MirrorFly’s console page
- Fill in the required details
- Create an account
- Verify your account via email
Step 2: Download UI Kit
- After email validation, login to your account
- Download the UI kits in the Download Section
- Extract the files in your device
Step 3: Get Your SDK License
- Go to the ‘Application Section’ of your Account Dashboard
- Copy the License Key
Section 2
Create an iOS App Project
Step 1: Create a new Swift Project
- Open Xcode
- In the startup window, click on “Create a new Xcode project” or,
- Choose File > New > Project
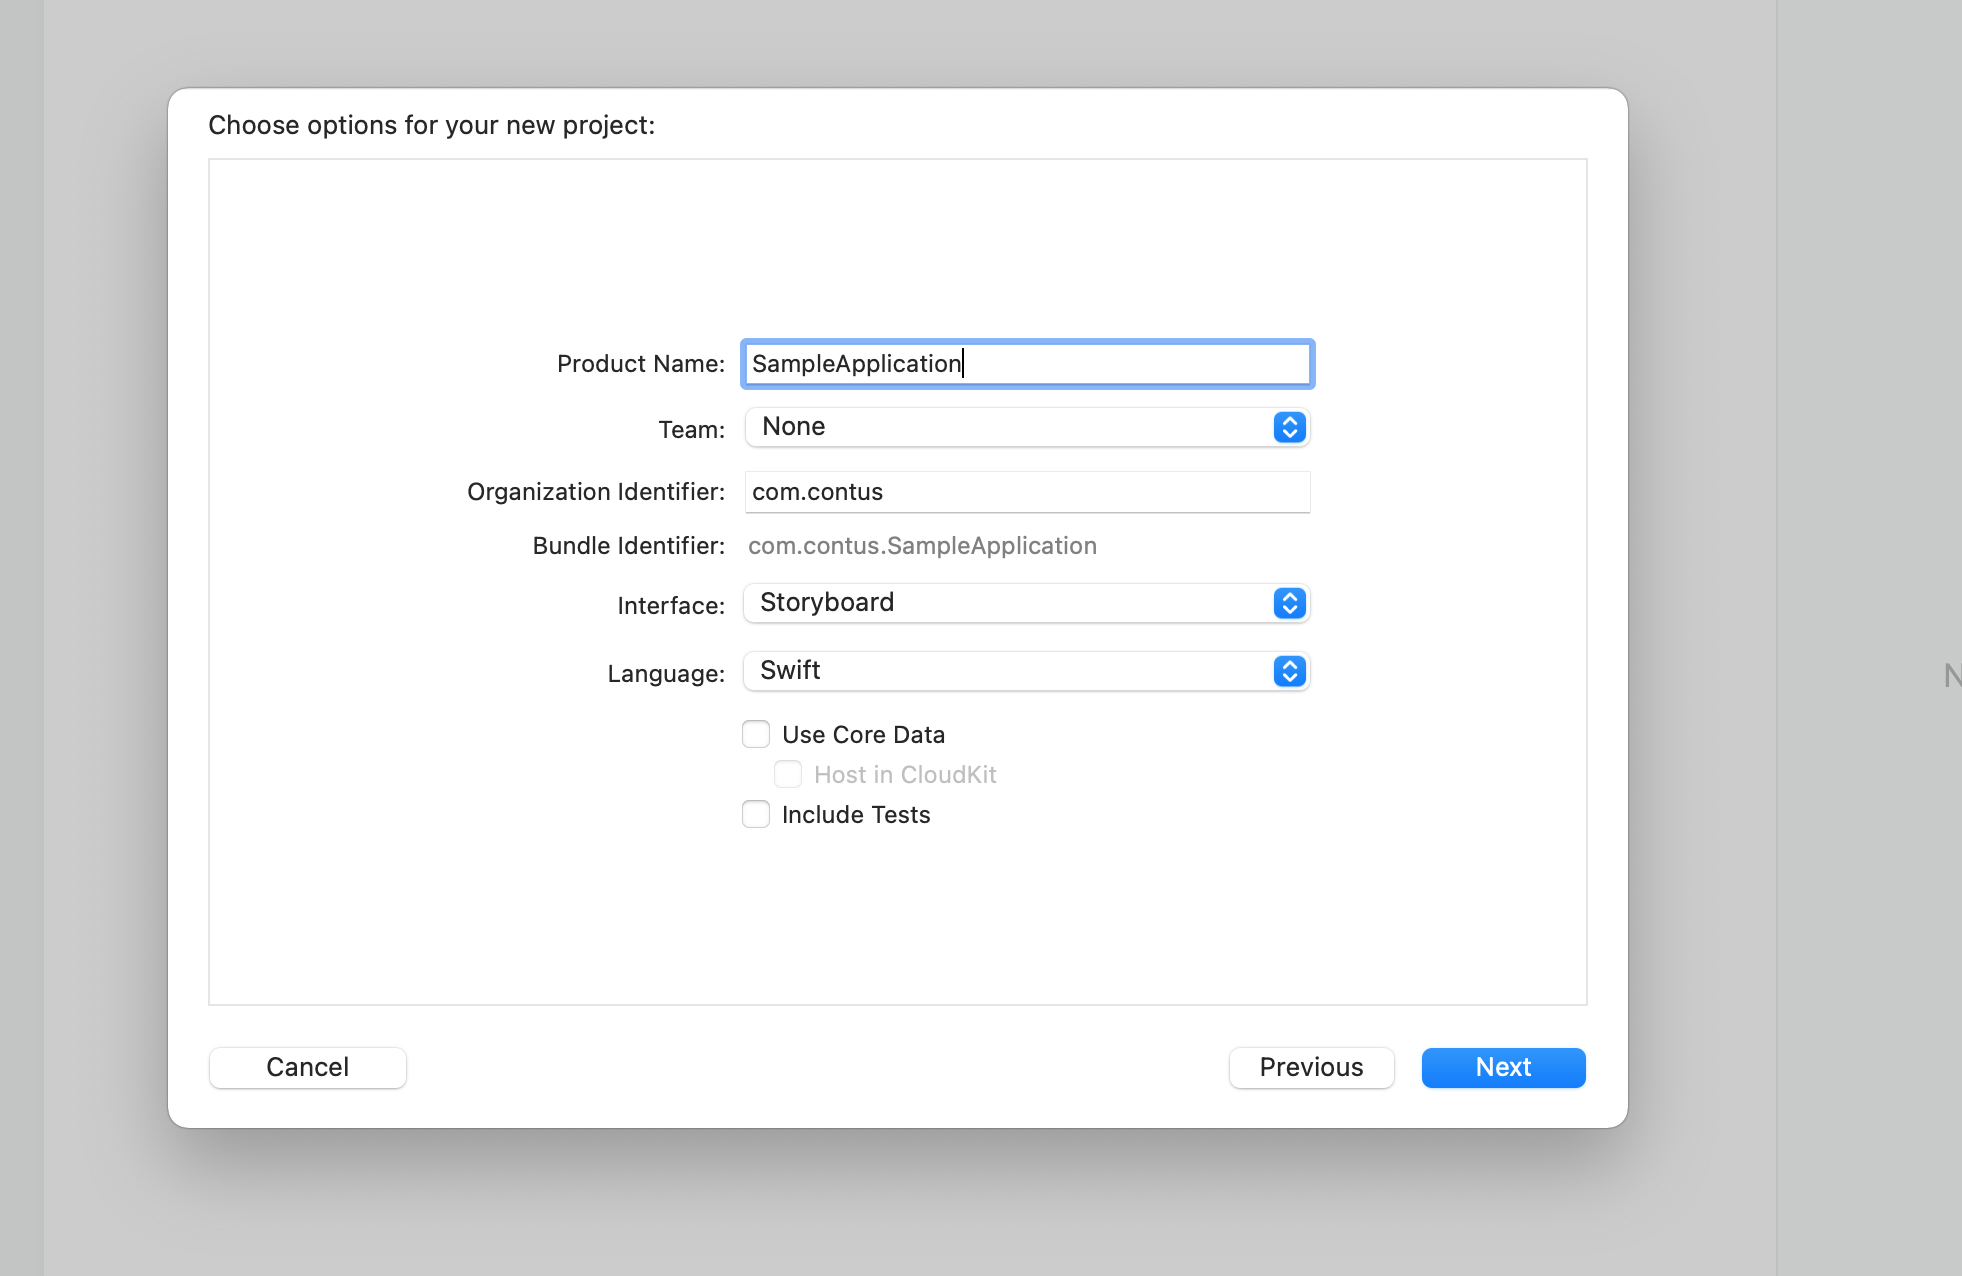
- Fill in the required fields.
Step 2: Download the UI Kit and Chat SDKs
- First, download the UI Kit SDKs that contain the customization elements
- Next, you need to download the chat SDKs that are used to build the communication functionalities of your app.
Section 3
Install the UI Kit
Step 1: Import the dependencies
- Go to your Project folder
- Import the frameworks (downloaded UI Kit files and SDK files) into it
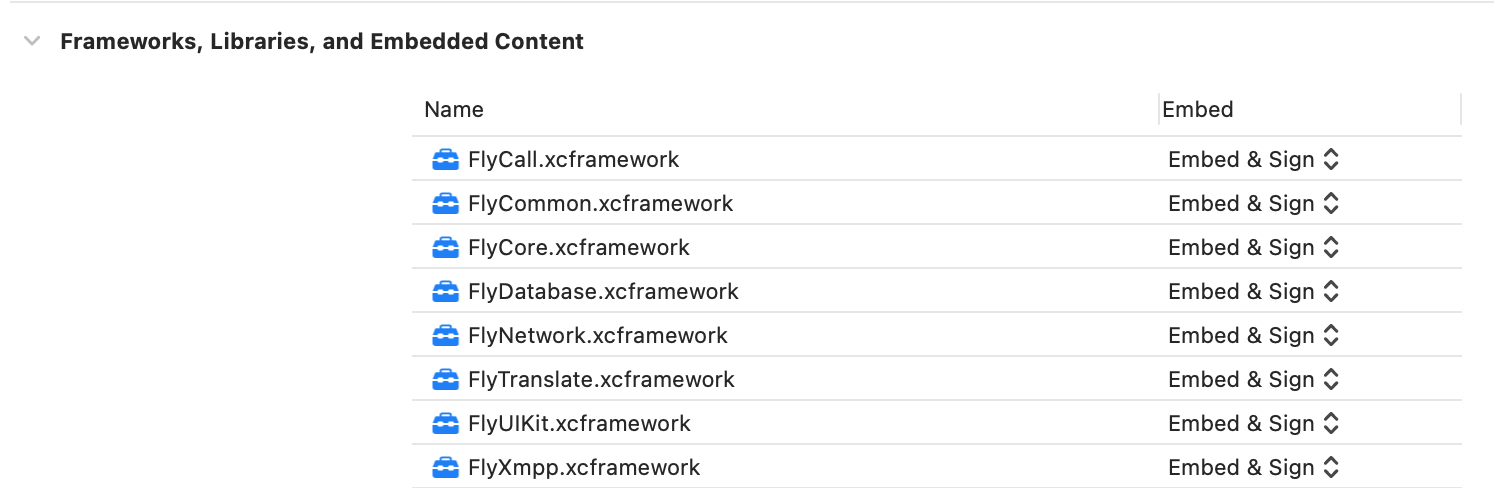
Step 2: Enable Embed & Sign to frameworks
- Go to Project
- Select Target and then General
- Choose Frameworks, libraries, and Embedded Content
- Select Embed & Sign for all the Chat SDK’s xcframeworks
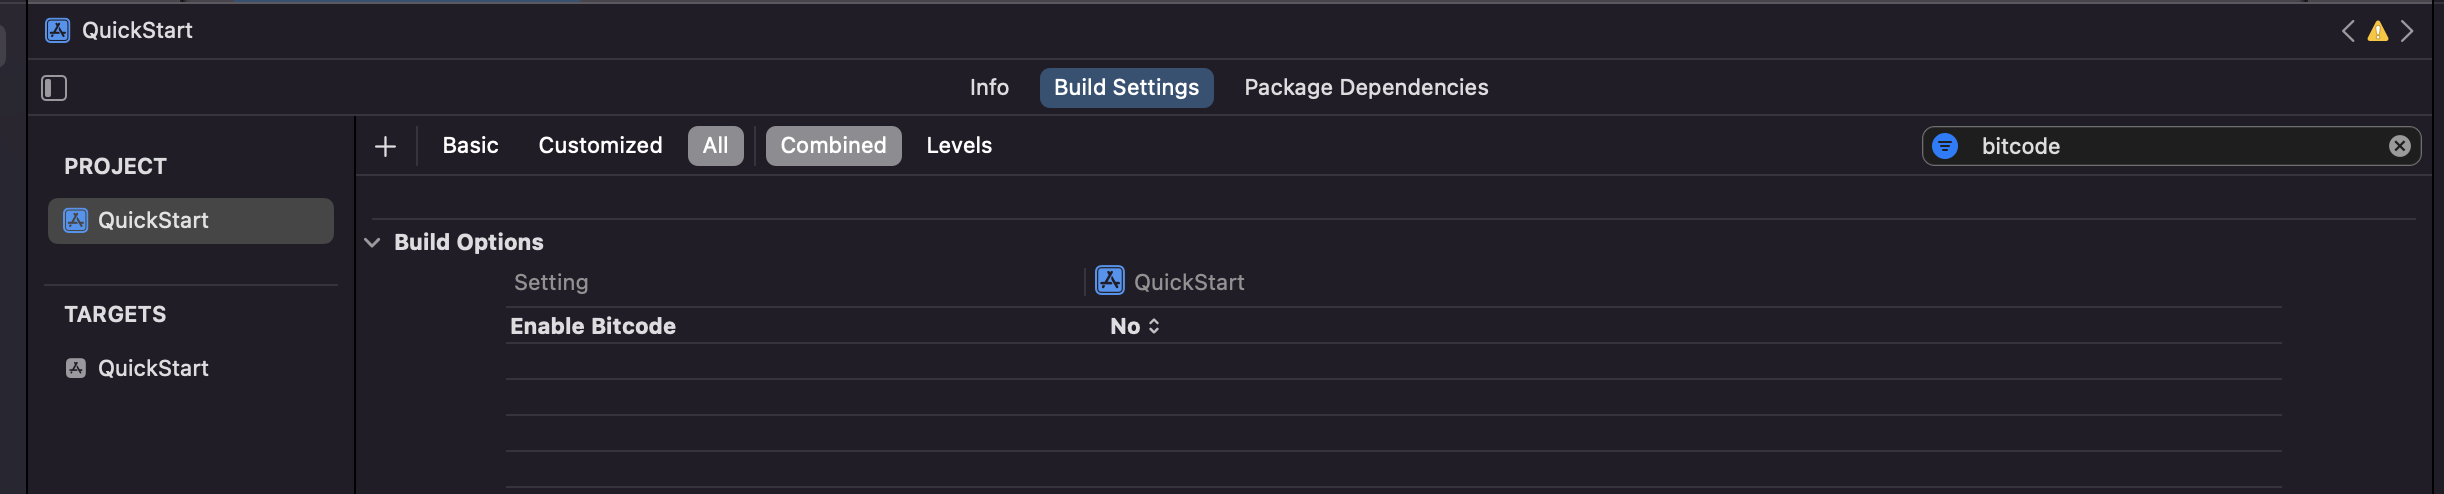
Step 2: Disable the bitcodes
- Go to Project
- Select Build Settings
- Search for the term ‘Bitcode’
- In the dropdown, select No
Step 3: Install Pod files
- Add the below-mentioned pods needed by your SDKs
  pod 'Alamofire'
  pod 'XMPPFramework/Swift'
  pod 'Toaster'
  pod 'Firebase/Auth'
  pod 'Firebase/Crashlytics'
  pod 'Firebase/Analytics'
  pod 'Firebase/Messaging'
  pod 'SDWebImage'
  pod "BSImagePicker", "~> 3.1"
  pod 'libPhoneNumber-iOS'
  pod 'NicoProgress'
  pod 'SocketRocket'
  pod 'Socket.IO-Client-Swift', '~> 15.2.0'
  pod 'GoogleWebRTC' # WebRTC for Calls
pod 'RealmSwift', '10.20.1'- Add the pod hook block at the end and install it
post_install do |installer|
installer.pods_project.targets.each do |target|
target.build_configurations.each do |config|
config.build_settings['IPHONEOS_DEPLOYMENT_TARGET'] = '12.1'
config.build_settings['ENABLE_BITCODE'] = 'NO'
config.build_settings['APPLICATION_EXTENSION_API_ONLY'] = 'No'
config.build_settings['BUILD_LIBRARY_FOR_DISTRIBUTION'] = 'YES'
end
end
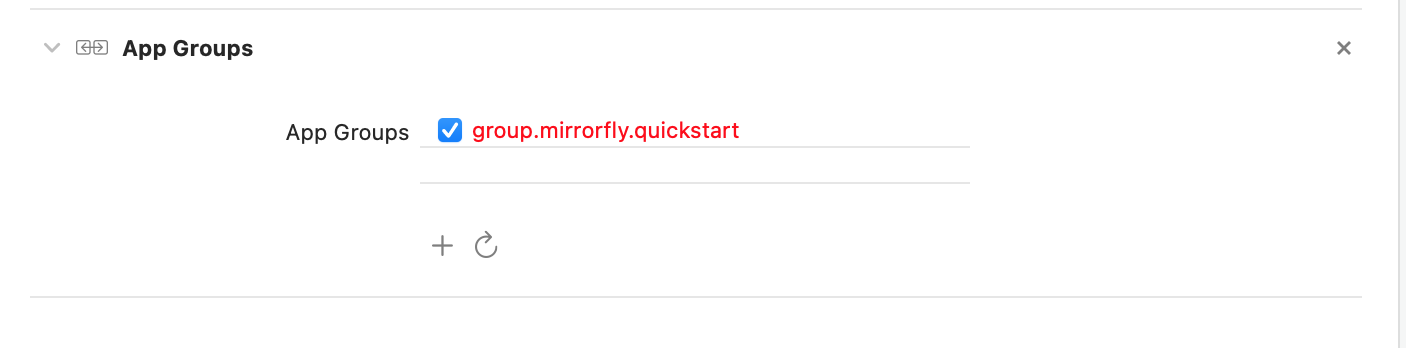
endStep 4: Enable group.mirrorfly.quickstart
- Go to Project and select Target
- Navigate to Signing & Capabilities
- At the top left corner, click +
- Search group.mirrorfly.quickstart and enable it
Section 4
Initialize the UI
Step 1: Import the UI components
- Use the import command and pull in the UIKit and FlyUIKit files into the project.
import UIKit
import FlyUIKit

class ViewController: UIViewController (
    override func viewDidLoad() {
        super.viewDidLoad()
        self.initialize()
    }

    func initialize () {

        FlyUIKitSDK.shared.initialization (userID: userId, licenseKey: licenseKey) ((isSuccess, error) in
        if isSuccess {
            self.getRecentChat()
        } else {
            print(error)
        }
    }
}
Step 2: Begin the UI instance
- Through the view controller, initialize the MirrorFlyUI instance as given below
import UIKit
import FlyUIKit

class ViewController: UIViewController {
    override func viewDidLoad() {
        super.viewDidLoad()
        self.initialize()
    }

    func initialize () {

        A FlyUIKitSDK.shared.initialization (userID: userId, licenseKey: licenseKey) ((isSuccess, error) in
            if isSuccess{
            self.getRecentChat()
        } else {
            print(error)
        }
    }
}
Section 5
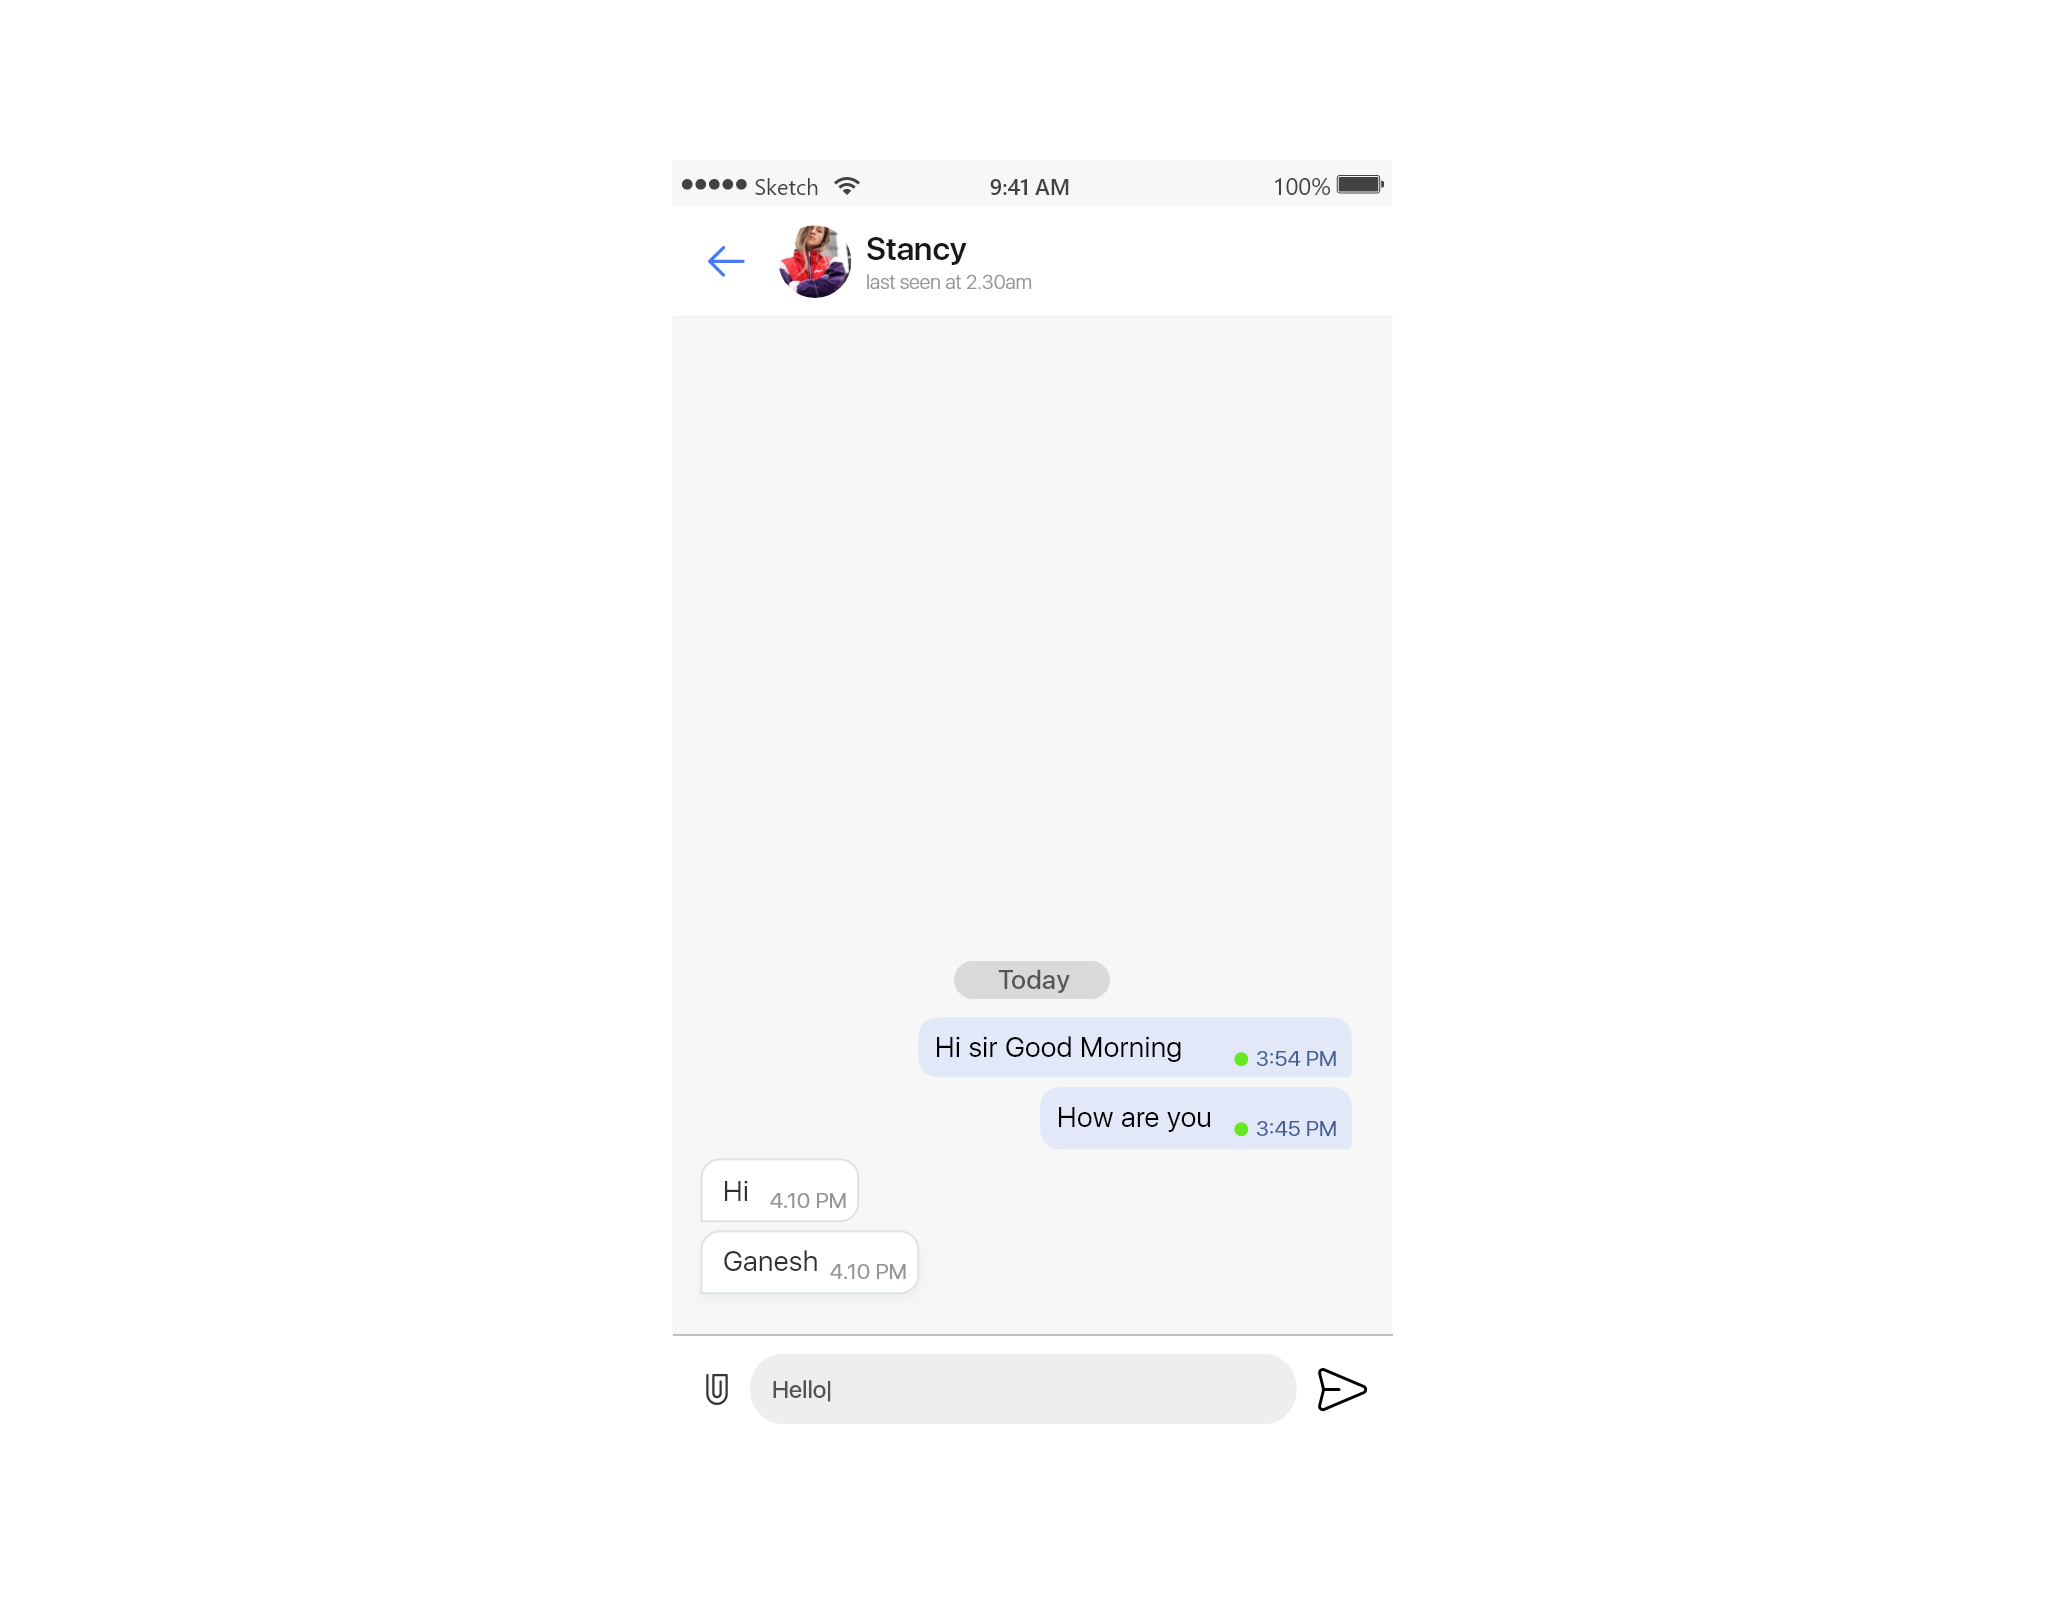
Display Recent Chat List
- To start the UI kit, you need to use the MFUIRecentChatListViewController command.
- Fetch the complete list of Recent chats using the below code:
import UIKit
import FlyUIKit

class ViewController: UIViewController {
    override func viewDidLoad() {
        super.viewDidLoad()
        self.initialize()
    }

    func initialize () {
        FlyUIKitSDK.shared.initialization (userID: userId, licenseKey: licenseKey) ((isSuccess, error) in
            if isSuccess {
                self.getRecent Chat()
            } else {
                print(error)
            }
        }
    }

    func getRecentChat() {
        let recentChatListViewController = MFUIRecentChatListViewController()
        recentChatListViewController.isInitialLoading = true
        self.navigationController?.pushViewController(recentChatListViewController, animated: true)
    }
}
Section 6
Send Your First Message
Once you’ve come to this step, it means your app is ready to run on a simulator or a plugged-in device.
Step 1: Run the app
- Select the chat type.App lands on the contacts page
- Select the user. Chat room gets created
- Enter your first message and hit send
Section 7
Set Up Customization of Your Chat App
There are several other customization options available with MirrorFly’s UI components. A few of the essential features are listed below:
- Set up light and dark themes
- Customize the font, color, and icon style
- Unread Message Count
- Timestamp of Last received message
- Background Color
Explore our advanced features
To wrap up,
In this article, you have learned the basic steps of integrating pre-built UI kits to your chat apps to build chat interfaces and how to use the components to create modern messaging features within your app.
While this guide demonstrates only the foundation of UI integration, there’s more to it in our upcoming articles. Meanwhile, you can check out our tutorial on how to add video calls to your iOS swift apps. Until then, we bid you our bye and best wishes!
Drive 1+ billions of conversations on your apps with highly secure 250+ real-time Communication Features.
Contact Sales 200+ Happy Clients
-
Topic-based Chat
-
Multi-tenancy Support

![]() Atchaya Jayabal leads Content at MirrorFly and is an expert in writing Tech, SaaS & B2B. She regularly publishes articles on CPaaS & Conversational AI in blogs.
Atchaya Jayabal leads Content at MirrorFly and is an expert in writing Tech, SaaS & B2B. She regularly publishes articles on CPaaS & Conversational AI in blogs.