

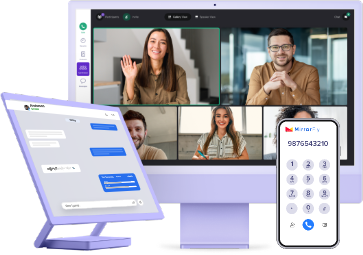
This article will focus on building a custom video chat app by directly integrating pre-built audio and video calling features. We’ll be using MirrorFly SDKs and React to create a robust live chat in react js app with real-time video and audio features.
I’ll walk you through,
- Where to get MirrorFly License Key
- Integrate the chat SDK into your Web Video Chat App
- Connect the Chat Client to MirrorFly Server
- Register a User
- Send or Recieve Messages
How to Create a React Video Calling App in 11 Steps
To start building your own react video chat app, begin by importing the JavaScript SDK followed by the React SDK integration.
Follow the below steps to perform the import.
Step 1: Get MirrorFly License Key
The first step in creating a web app is to download the MirrorFly License Key. To do this, follow the below steps as instructed.
- Go to MirrorFly Console Page
- Fill in your basic details on the registration page
- Click on Sign up
- Verify your account using your registered email
Once you create your account,
- Login to your account
- Go to the Overview section
- Download the Javascript SDK
- Next, go to the Application Info section
- Copy the License key
React Video Chat SDK Into Your App?
- Complete Source Code
- Lifetime Data Ownership
- Deploy on Own Server
Step 2: Import Javascript SDK
- Extract the files from the SDK zip folder and import them into your app.
- After Importing, add the script file to your index.html
<script src="./index.js"></script>
<script src="./socket.io.js"></script>
<script src="https://webrtc.github.io/adapter/adapter-latest.js"></script>- Next, continue to add React SDK into the app.
Step 3: Import React SDK
- Include the React script into your index.html
<script src="./index.js"></script>
<script src="./socket.io.js"></script>
<script src="https://webrtc.github.io/adapter/adapter-latest.js"></script>- In the project root, create a new file SDK.js and configure as follows
const SDK = window.SDK;
export default SDK;- Next, import the SDK into your web video chat app
import SDK from "./SDK";Step 4: Initialization of Call SDK
- This step involves configuring the react video calling SDK to handle real-time connection status updates in your client app.
- Next, paste the MirrorFly License Key on the license key param, as mentioned in step 1
- Pass these data through the SDK using the below method
const incomingCallListener = (res) => {};
const callStatusListener = (res) => {};
const userTrackListener = (res) => {};
const muteStatusListener = (res) => {};
const missedCallListener = (res) => {};
const callSwitchListener = (res) => {};
const inviteUsersListener = (res) => {};
const mediaErrorListener = (res) => {};
const callSpeakingListener = (res) => {};
const callUsersUpdateListener = (res) => {};
const callUserJoinedListener = (res) => {};
const callUserLeftListener = (res) => {};
const helper = {}
Below are the Sandbox details
const incomingCallListener = (res) => {};
const callStatusListener = (res) => {};
const userTrackListener = (res) => {};
const muteStatusListener = (res) => {};
const missedCallListener = (res) => {};
const callSwitchListener = (res) => {};
const inviteUsersListener = (res) => {};
const mediaErrorListener = (res) => {};
const callSpeakingListener = (res) => {};
const callUsersUpdateListener = (res) => {};
const callUserJoinedListener = (res) => {};
const callUserLeftListener = (res) => {};
const helper = {}

const initializeObj = {
  apiBaseUrl: "https://api-preprod-sandbox.mirrorfly.com/api/v1",
  licenseKey: "XXXXXXXXXXXXXXXXX",
  isTrialLicenseKey: true,
  callbackListeners: {
    incomingCallListener,
    callStatusListener,
    userTrackListener,
    muteStatusListener,
    missedCallListener,
    callSwitchListener,
    inviteUsersListener,
    mediaErrorListener,
    callSpeakingListener,
    callUsersUpdateListener,
    callUserJoinedListener,
    callUserLeftListener,
    helper
  },
};

await SDK.initializeSDK(initializeObj);
The response of the method will look like below
{
  "statusCode": 200,
  "message": "Success"
}
Step 5: Registering an App User
- To register a new user, you need to use the below method.
- After you register, you’ll have a username and a password. You can use these credentials to establish a connection with the server.
await SDK.register(`USER_IDENTIFIER`);The response of this method will look as follows:
{
  statusCode: 200,
  message: "Success",
  data: {
    username: "123456789",
    password: "987654321"
  }
}
Step 6: Connect the Chat SDK to MirrorFly Server
- Once you connect the chat SDK to the server, the approval message will appear as ‘statusCode of 200’. Otherwise, an execution error may appear.
- Next, you can trace the connection status in the connectionListener callback function.
- If there are any discrepancies in making the server connection, the SDK will display an error message in the callback.
await SDK.connect(`USERNAME`, `PASSWORD`);Step 7: Make Video Call
- You can start making live video calls by adding the caller’s user JID in makeVideoCall method.
- Once you initiate the call, the SDK will trigger the callback callStatusListener and will receive the callee user call status
await SDK.makeVideoCall(['USER1_JID', 'USER2_JID'...]);Step 8: Make Group Video Call
- Provide the callee’s user JID & Group ID into the makeVideoCall method and initiate the call.
- Once you initiate the call, the SDK will trigger the callback callStatusListener and will receive the callee user call status
await SDK.makeVideoCall(['USER1_JID', 'USER2_JID'...], 'GROUP_ID');Step 9: Receive a Call
- You need an incomingCallListener callback that is already registered with the callee’s client app, to receive an incoming call.
- The callee will receive the call data in the callback whenever a user calls another user from your app.
// Callback Response Argument Structure
{
    allUsers:["USER1_JID", "USER2_JID",...],
    callTime: 1615878543994005,
    callType: "audio|video",
    groupId: null|GROUP_ID,
    roomId: "wmupbheao",
    status: "calling",
    toUsers: ["USER_JID"]
    userJid: "FROM_USER_JID"
}
Step 10: Call Answer
To answer an incoming call, you need to use the answerCall() method
await SDK.answerCall();Step 11: Decline Call
To decline an ongoing call, you need to use the endCall() method
await SDK.endCall();Conclusion
In this post, you have learned how to create video chat into your web app with React and Integrate MirrorFly In-app Chat SDK to your app, set up a server connection and make video calls.
I believe this article has done a fair job of educating you on the necessary details to build a react video chat app. I appreciate your feedback on your app-building experience with me.
Also, your suggestion on which topic you’d like me to write next on would be much appreciated as comments below. Bid you bye until I meet you with yet another interesting insight!
Get 1000+ messaging features along with video and voice calling, into any web or mobile app with end-to-end encryption.
Contact Sales 100% Customizable
-
Custom Security
-
On-Premise Hosting

Frequently Asked Questions (FAQ)
ReactJs is a component-based Javascript library that helps developers to create dynamic user interfaces for mobile and web applications. When a ReactJS is loaded into a browser, it creates a Virtual DOM, which is a virtual representation of a UI that divides the UI codes into smaller components. These components function similarly to the JavaScript properties or classes that act as the receiver of user inputs.
Yes. ReactJS supports cross-platform app development and works well in collaboration with other technologies and frameworks to build iOS and Android mobile apps. However, to build high-quality Android apps using ReactJS, one must use the React Native framework as it helps developers to build quickly and with reduced maintenance costs.
Yes. React Native is the best choice for developing iOS apps as its syntax is easy, supports cross-platform development, and with just a single code, you can deploy it on both iOS and Android devices. Further, React uses native components and due to which the app may look like a native app.
ReactJS is one of the popular and flexible front-end JavaScript languages that is used to build highly interactive mobile and web apps. Considering its benefits, some of the tech giants have used ReactJS to build applications like Facebook, Netflix, PayPal, WhatsApp, Instagram, Discord, Reddit, and many others.
WebRTC (Web Real-time Communication) is a protocol that uses React Router to provide P2P audio and video communication between web browsers without the need for any plugins or third-party software in ReactJS.
Related Articles
- Build React Native Chat App Using MirrorFly SDK
- A Guide To Build Chat App with react-native-gifted-chat
![]() A technical content marketer specializing in Real-time Communication Solutions, adept at making complex concepts easy to understand.
A technical content marketer specializing in Real-time Communication Solutions, adept at making complex concepts easy to understand.
I want to demo the video SDK for react native and need to know how it can make my app ready in 10 mins with voip features and others as well.
I am planning to build an app with in app video call feature. On react native may I know your pricing for self hosted license.
I would like to find out more about the pricing for the React native video call API, we currently have a self built video chat for reactnative firebase but I’m looking out for things that may help to increase offerings for our business users.
Interested in migrating our video call system from twilio. A deal breaker is we use react-native, web and need end to end encryption in the video calls
Hi, I am building a video app using React Native and would like to take advantage of the SaaS video calling API/ SDK solution. We are expecting 2600 users/mo to make on avg 2 video calls each/ mo. Can you explain your pricing model and provide me a monthly estimate?
Hello we are building a react video chat platform. we need to integrate a few features: audio calling, group voice chat, app to app calling and app to phone calling. Is there any demo project?
Hi Suhail, thanks for your interest in MirrorFly’s React WebRTC Video APIs. If you want the demo project talk to our experts.
I am building a react video chat platform with voice call features to connect healthcare providers to patients. I need to integrate your APIs and SDKs for more customized features.
Hi John! Nice to know that you are building a react video call/conferencing app and appreciate your interest in MirrorFly’s react webrtc video call sdks. We offer 2 flexible pricing models – SaaS and SaaP (self-hosted solution) at users’ convenience. You may choose our SaaS solution if you would like to use our features for a monthly subscription fee. On the other hand, our self-hosted video calling solution renders you 100% customizable video, voice, and chat features for a one-time license cost. To know more about our pricing details, please visit our pricing page.
Dear Mirrorfly, i need to make a react video app that run on both ios and android have video messages and text messages you can contact me on my email. Thanks
Sure. MirrorFly can help you add video, voice and chat features for your react video app using MirrorFly react video sdk. You can check out our monthly plans on our pricing page or talk to our experts to purchase our SDKs for a one-time license cost.
Hi, we are building a react video conferencing app and we are looking for a 1-to-1 call, audio call and recording features. May i know the pricing of your React video SDK?
MirrorFly React Video API, SDK comes built-in with end-to-end encryption protocols like AES-256 and SSL. Also, they are compatible with compliances like GDPR and HIPAA. So, you can confidently add 1-to-1, group react video call features to your app without worrying about the security infrastructure and its maintenance.
Hi, I am creating a video chat app using react. I need a video call support. Can you give me more detail about pricing and React SDK details how I can test before purchase. Is there any free react demo project? Thanks, Thilak
It’s great to know that you are interested in our video call api for react. You can check out our tutorial on how to create a react video call application in android and the codes to block users or groups in your video app for the implementation. If you need further assistance, contact our support team.
Can multiple individuals participate in a single video call using this React JS video chat app? It would be fantastic to have a dependable platform for holding virtual events or online meetings with big audiences.
Glad to know about your services. You can avail our react video api features with pre-built react video UI. You can contact our experts to know how our SDK can boost your in-app engagement from our team of experts. Contact our support team.
How secure is this React JS video messaging app? Are there any encryption safeguards in place to safeguard video call privacy and stop unauthorised access to private data?
Does this React video call app offer a feature for video call recording? Businesses would benefit from a tool that enables them to record crucial meetings or presentations for later use.
Hello, I’m a developer for a company in Portugal, and that company does Online Coaching Support (Training and nutrition plans). The Company have about 40 employees (personal trainers and nutritionists) that gave online support via chat. The clients have an app to receive the training and nutrition plan. Imagine that the employees are all using just one account, but each customer have his account. Do you have something like this video chat app using react tech?
Thanks, Ferreira for the positive response. As you are looking for the customization possibility, I would like to add that MirrorFly’s self-hosted react js video SDKs offer 100% customizable video chat solutions for Android, iOS, and the web, for a one-time license cost. If you’re interested to learn what more we render, talk to our experts.
I am looking for a complete solution for react js video chat app for our communication-based application forth both Android and iOS.
Hello Susan, it is really amazing news that you are building a react js video call solution and are interested in our video SDKs. We offer SaaS and self-hosted pricing models for users based on their needs. To know more about our pricing, please visit our pricing page.
Basically, we are building a react video chat app our customers where we wanted to connect two parties without knowing each other’s phone number. We followed the document and got to know that there is also a feature where users can join with a phone number. Regarding the same, I wanted to understand how many parallel meetings with different participants we can schedule using react webrtc video call.
Hi Venkat! MirrorFly’s video calling React video SDKs offer 1-to-1 and group chats, push notifications, call muting, call logs, language translation, & other features at the best prices. To know more about our features, please visit our video call solution page.
Hi, Looking to start a video chat app using React JS with call option. I am looking to host on azure, with web, android, and ios option. Please email me with what options do I have? How you can be of assistance, etc.
Hi Abilasha, it is really great news that you are building a react js video chatting app and are interested in our video SDKs. We offer SaaS and self-hosted pricing models for users based on their needs. To know more about our pricing, please visit our pricing page.
I am looking to build a React js video calling app that supports in android, ios and website. Could you please tell me the license pricing Thanks
Hi Kenny! Nice to know that you are building a React JS video messaging app and appreciate your interest in MirrorFly’s in-app video chat SDKs. We offer 2 flexible pricing models – SaaS and SaaP (self-hosted solution) at users’ convenience. You may choose our SaaS solution if you would like to use our features for a monthly subscription fee. On the other hand, our self-hosted video calling solution renders you 100% customizable video, voice, and chat features for a one-time license cost. To know more about our pricing details, please visit our pricing page.
Let me know for One to one video call solution for react js video call app how much the license cost and what time will be taken
Hi Dayana, thanks for your interest in MirrorFly’s React JS Video Chat APIs. If you are interested to know about the pricing details, please visit our pricing page.
I have a team already and i Want to explore more about react video chat app
Hello Nelson, it is amazing to know that you are interested in our video chat SDKs for your react js mobile application development. MirrorFly’s video APIs offer exquisite features like 1-to-1 and group video chats, file and screen sharing, and a lot more at the best prices. To know more about our features, visit our video SDK page.