Video calling apps are becoming a handy tool for users around the world to make purchases, attend meetings and have quality time with their family, right from where they are.
Understanding the dire role played by these apps, businesses are trying to incorporate video calls into their apps as an essential feature, to connect their user base and elevate trustworthiness with virtual support.
While the trend is going up, several programmers are opting to integrate pre-built video call features into their apps, owing to a fast and easy development process.
Well, to prove the above mentioned statement is real, I'll walk you through the steps to build a web app with video calls functionality. To integrate video calls, I'll use the MirrorFly Video Call SDKs, which have interaction-rich features and iron-clad encryptions.
Without wasting any time, let's get the process started!
Step 1 : Sign up here to create a MirrorFly user account.
Step 2 : Login to your Account
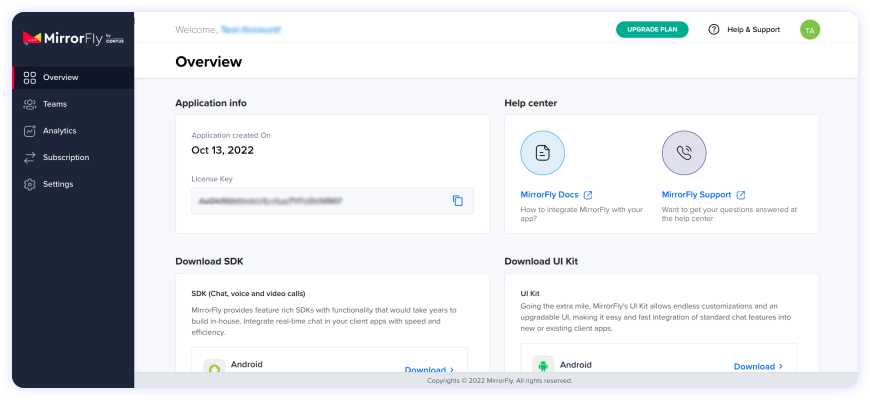
Step 3 : Retrieve the license key from the 'Application Info' section.
MirrorFly Call for JavaScript simplifies the process of adding in-app calls by providing all the essential features. As a first step, you need to import JavaScript into your app.
To install MirrorFly Video Call SDK, you need to follow the below steps:
Step 1 : Install MirrorFly SDK in your app.
npm i mirrorfly-sdk
Step 2 : Select the location and import the SDK.
import * as SDK from "mirrorfly-sdk";
Step 1 : Click the Download button
Step 2 : Unzip the downloaded file and copy its contents into your app.
Step 3 : After copying the file, add the script file to your index.html.
<script src="./index.js">
Step 4 : Now that you've included the SDK object in your application, you can proceed with the initialization process
Step 5 : After successfully integrating the SDK, proceed with implementing the language that you prefer for the client.
To initialize the call SDK, you need specific data that reflects changes in the client's app connection status. Paste the license key in the 'licensekey' parameter and utilize the below method to pass this data through the SDK for the next steps.
                     const incomingCallListener = (res) => {};
                         const callStatusListener = (res) => {};
                         const userTrackListener = (res) => {};
                         const muteStatusListener = (res) => {};
                         const missedCallListener = (res) => {};
                         const callSwitchListener = (res) => {};
                         const inviteUsersListener = (res) => {};
                         const mediaErrorListener = (res) => {};
                         const callSpeakingListener = (res) => {};
                         const callUsersUpdateListener = (res) => {};
                         const callUserJoinedListener = (res) => {};
                         const callUserLeftListener = (res) => {};
                         const helper = {}

                         const initializeObj = {
                           licenseKey: "XXXXXXXXXXXXXXXXX",
                           callbackListeners: {
                             connectionListener,
                             incomingCallListener,
                             callStatusListener,
                             userTrackListener,
                             muteStatusListener,
                             missedCallListener,
                             callSwitchListener,
                             inviteUsersListener,
                             mediaErrorListener,
                             callSpeakingListener,
                             callUsersUpdateListener,
                             callUserJoinedListener,
                             callUserLeftListener,
                             helper
                           },
                         };

                         await SDK.initializeSDK(initializeObj);
Step 1 : Use the below method to register the user.
Step 2 : After registration, you'll receive a username and password. Use these credentials to establish a connection with the server through the 'connect' method.
await SDK.register(`USER_IDENTIFIER`);
Sample Response:
                   {
                   statusCode: 200,
                   message: "Success",
                   data: {
                     username: "123456789",
                     password: "987654321",
                     isProfileUpdated: true,
                     isSandbox: true,
                     userJid: "1234567890@xmppdomain"
                   }
               }
Step 1 : Use the credentials obtained during registration to establish a connection with the server.
Step 2 : After successfully creating the connection, you will receive an approval message with a 'statusCode of 200'. Otherwise, you may encounter an execution error.
Step 3 : You can also monitor the connection status by checking the information received in the connectionListener callback function.
Step 4 : If you encounter an error during the server connection, you will receive an error message through the callback.
await SDK.connect(`USERNAME`, `PASSWORD`);
Start a call by inputting the callee's user JID into the makeVoiceCall method. When the call is successfully initiated, the callStatusListener callback will be triggered, and you will receive the call status of the caller user.
await SDK.makeVoiceCall(['USER1_JID']);
Response Format:
                     {
                       statusCode: 200, // Number - status code
                       message: "", // String - Success/Error Message
                       callType: "", // String - Call Type - "audio"
                       roomId: "" // String - Unique room ID
                       }
Sample Code:
                  <html>
                  <audio id="audio" autoplay playsinline>
                  <video id="video" autoplay playsinline>
                  <script>
                     //let track = TRACK_OBJECT from the callback method
                     //let element = ELEMENT_OBJECT in which you need to play the audio/video
                     let stream = new MediaStream([track]);
                     try {
                         element.srcObject = stream;
                     } catch (e) {
                         try {
                           element.src = URL.createObjectURL(stream);
                         } catch (e) {
                           console.error("Error attaching stream to element", e);
                       }
                   }
                  </script>
                </html>
You need to supply the track object which was received in the callback method to the audio/video element based on the track type that you have received.
To receive an incoming call, make sure that the incomingCallListener callback is registered in the callee's client app. When a user initiates a call to another user, the callee user will receive the calling data through this callback.
                   // Callback Response Argument Structure
                     {
                         allUsers:["USER1_JID", "USER2_JID",...],
                         callTime: 1681905421215,
                         callType: "audio|video",
                         groupId: null|GROUP_ID,
                         localUser: BOOLEAN,
                         roomId: "wmupbheao",
                         roomLink: "ndy-bmkb-eui"
                         status: "calling",
                         toUsers: ["USER_JID"],
                         userDetails: {},
                         userJid: "FROM_USER_JID",
                         usersStatus: [{}]
                     }
To respond to a call, utilize the answerCall method.
await SDK.answerCall();
Sample Code:
                  <html>
                    <audio id="audio" autoplay playsinline>
                    <video id="video" autoplay playsinline>
                    <script>
                       //let track = TRACK_OBJECT from the callback method
                       //let element = ELEMENT_OBJECT in which you need to play the audio/video
                       let stream = new MediaStream([track]);
                       try {
                           element.srcObject = stream;
                       } catch (e) {
                           try {
                             element.src = URL.createObjectURL(stream);
                           } catch (e) {
                             console.error("Error attaching stream to element", e);
                         }
                     }
                    </script>
                  </html>
To end an ongoing call, make use of the endCall method.
await SDK.endCall();
As mentioned at the start of this guide, the increased use of video calling apps doesn't seem to be slowing, making it obvious that - the demand for virtual communication is consistently on the rise. At this trend, pre-built SDKs are the go-to option to build video calls with the communication, security and moderation features that come along. I'm glad you are considering it already.
Now that you know how to add video calls into your web app, I'll recommend your next step as to add the other interaction features, to create a modern app experience.
Check out the other features from MirrorFly that you may find useful to your users.
Add real-time video calling to your web app in minutes using our JavaScript SDK with simple integration steps.
Request DemoA Javascript web app is a software application that makes use of Javascript programming language for building client-side pages or responsive web pages allowing users to complete complex actions.
Additionally, these apps are known to dynamically update content without requiring a full reload.
Absolutely yes. Javascript comes as the most versatile programming language to build web apps for both client-side and server-side.
In the front end, the language is used to create dynamic user interfaces and handle DOM data seamlessly. While JS can be used with platforms like Node.js to script server-side functionalities.
To code in Javascript for building web apps is as simple as it can be. All you need to do is add the JS code to the CSS and HTML files of your web app, write codes that include variables and functions, add elements like buttons or forms to the linked file, and finally test and debug.
Inorder to implement video call features into your websites, you need to first set up the web server and include WebRTC API for video calling. Then, write codes in HTML/CSS to create stunning user interfaces and initialize media streams.
Post which, you can establish a connection and start streaming. Finally, test and debug.
Here's how you can make a web-based video calling capability:
Step 1 : Choose a video call solution or video API provider that offers this functionality and has implemented WEbRTC tech in it.
Step 2 : Give access to our microphone and camera.
Step 3 : Initiate a call to your peer by joining the meeting room.
Step 4 : Check whether the provider offers unlimited free calls or charges based on number of participants.
Step 5 : End the call and review settings if needed.
Yes. Javascript is the most-desired language by developers to create dynamic and responsive web, mobile, and even desktop apps.
Plus, this language can be used with frameworks like React Native to build cross-platform apps thus allowing them to reuse code wherever applicable.
Drive 1 billion + conversations on any Android, iOS, or Web app with 500+ chat features & 100+ UI components.