This tutorial will explain how to build a chat app for the web with Angular. We will start by setting up a new Angular project and installing the MirrorFly Chat SDK. We will then integrate the chat SDK into our Angular project, connect the SDK to the MirrorFly server and implement the in-app messaging functionality.
Let’s get started!
To build a web chat app using Angular, you will need the following requirements:
Angular CLI - The Command Line Interface needed for creating and managing projects in Angular. You can install it using the following command:
npm install -g @angular/cli
IDE/ Code Editor: Use any code editor of your choice to build your angular chat app. The popular editors include Visual Studio Code, WebStorm and Sublime Text.
Backend Service: A Backend service typically lets you handle the chat messages, store and retrieve them as per your convenience. Some of the most used backend services include Node.js and Firebase.
Chat SDK: To implement chat functionality into your app, you will need a chat SDK. We will use MirrorFly chat SDK for this project.
Follow the below steps to get the license key:
Step 1 : Go to the MirrorFly Console Page.
Step 2 : Fill in the required fields and create your MirrorFly account.
Step 3 : Verify your account details via your registered email.
Step 4 : Sign into your account.
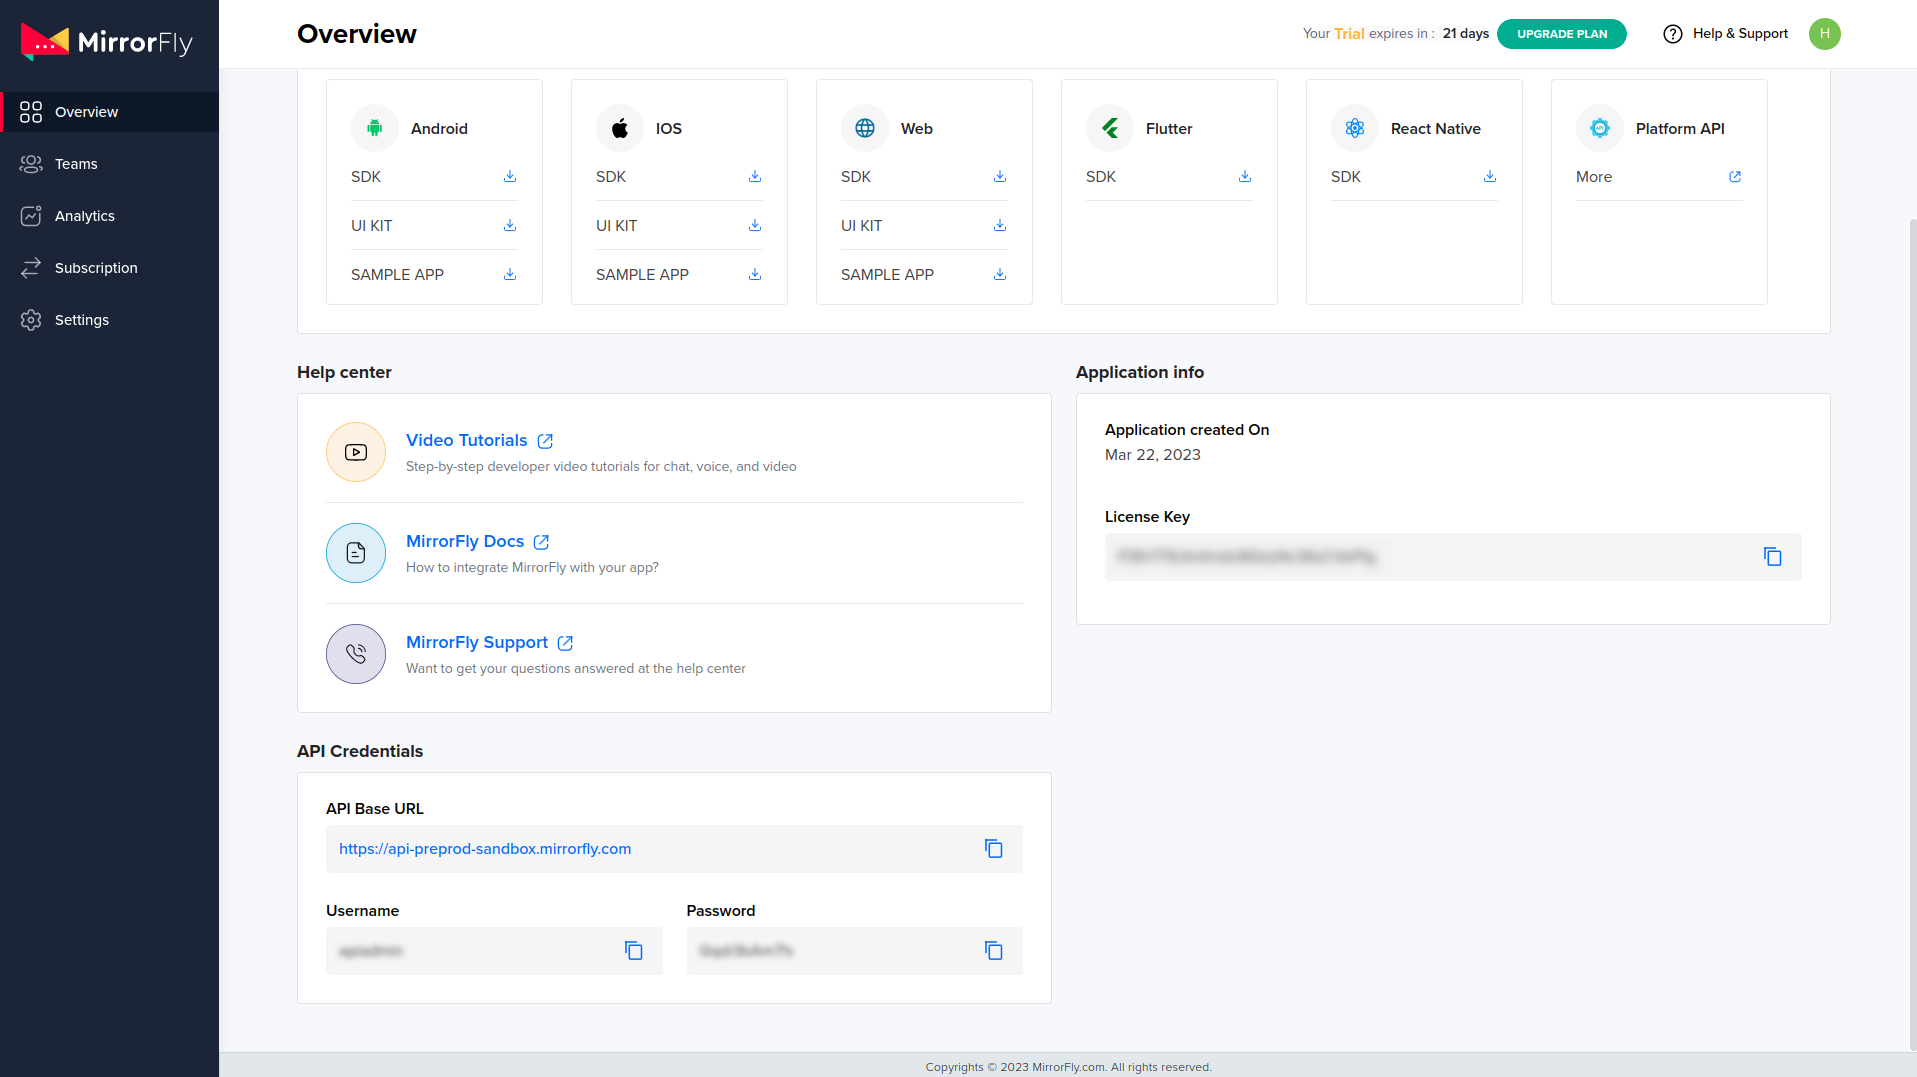
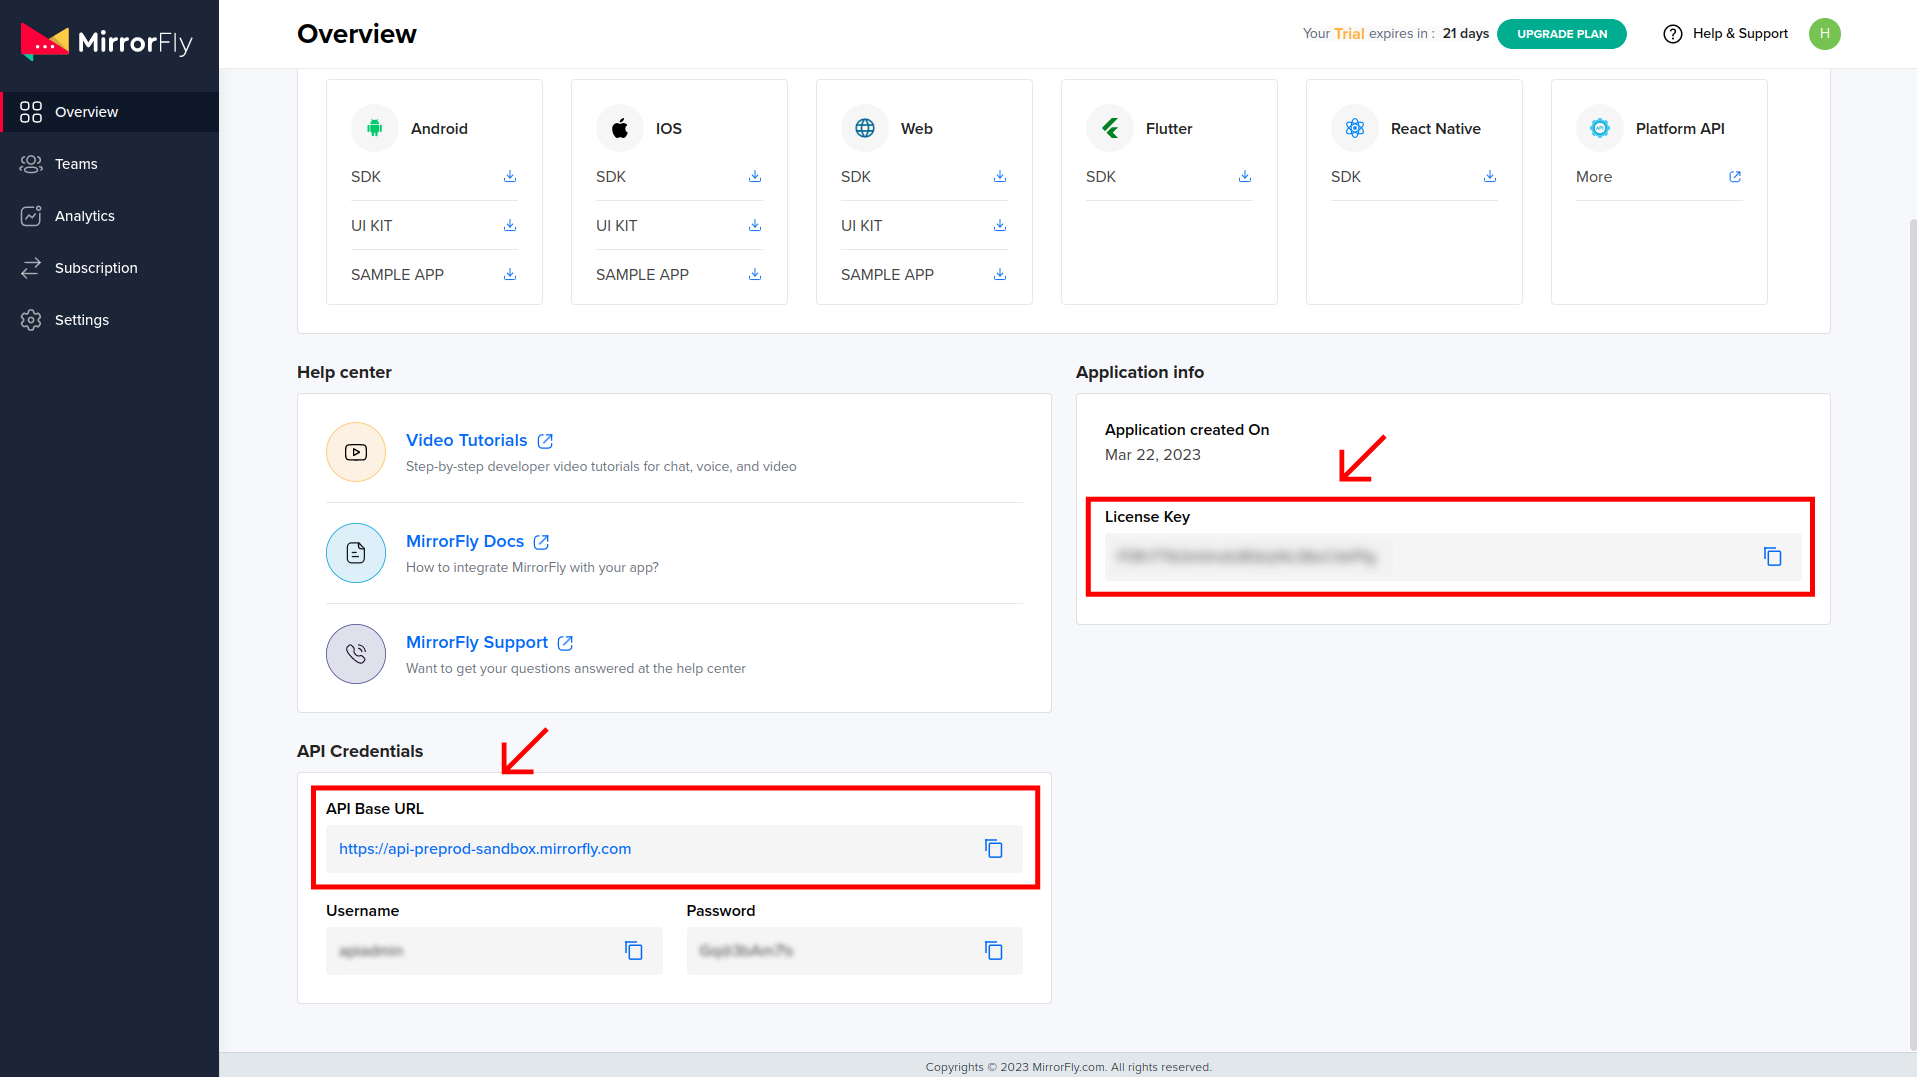
Step 5 : Go to the Account overview page.
Step 6 : Under the Application Info section, get your SDK License Key.
Step 7 : Next, go to the downloads section.
Step 8 : Download the Angular Chat SDK.
Step 9 : Extract the SDK files from the ZIP folder.
To start with building in-app chat, you’ll first need to import Javascript into your app.
In this step, we’ll create a New Android App project.
Step 1 : Go to your project’s root folder
Step 2 : Paste the extracted files from the SDK folder.
Step 3 : Open the angular.json
Step 4 : Go to build > options > scripts
Step 5 : Find the array of scripts
Step 6 : To the downloaded SDK JS files, add the relative file paths
Step 7 : Next, go to the root component and add the below code
declare var SDK: any;
Step 8 : Next, go to the root component and add the below code to the ngOnInit
Step 1 : To initialize the chat SDK, connection status data is required.
Step 2 : The license key should be provided in the "licensekey" parameter to start the initialization process.
Step 3 : Use the provided method to pass the connection status data to the SDK for further processing.
                     const initializeObj = {
                       apiBaseUrl: `API_URL`,
                       licenseKey: `LICENSE_KEY`,
                       isTrialLicenseKey: `TRIAL_MODE`,
                       callbackListeners: {},
                     };
                     await SDK.initializeSDK(initializeObj);
Step 4 : The "initializeObj" object is passed as a parameter to the "initializeSDK" method. The method initializes the SDK with the provided configuration, establishes a connection with the server using the specified API URL, and authenticates the client using the license key.
Step 5 : The "await" keyword is used to ensure that the initialization process is completed before proceeding with further execution of the code.
Test The Code In The Sandbox
Step 1 : Go to the MirrorFly Console Dashboard
Step 2 : From the Overview Section, get the apiUrl and licenseKey
                  function connectionListener(response) {
                    if (response.status === "CONNECTED") {
                    console.log("Connection Established");
                    } else if (response.status === "DISCONNECTED") {
                    console.log("Disconnected");
                    }
                  }

                  const initializeObj = {
                    apiBaseUrl: "https://api-preprod-sandbox.mirrorfly.com/api/v1",
                    licenseKey: "XXXXXXXXXXXXXXXXX",
                    isTrialLicenseKey: true,
                    callbackListeners: {
                    connectionListener
                    },
                  };
                  await SDK.initializeSDK(initializeObj);
Step 3 : The "connectionListener" function takes a single parameter called "response", which contains the status of the connection.
Step 4 : If the status is "CONNECTED", the function logs a message to the console saying "Connection Established".
Step 5 : If the status is "DISCONNECTED", the function logs a message saying "Disconnected".
Step 6 : By registering the "connectionListener" function as a callback function to the "callbackListeners" property, the SDK will call this function whenever the connection status changes.
Step 7 : The function can then perform any necessary actions based on the status of the connection.
Step 8 : The response for the above example code will look something like below:
                 {
                 "statusCode": 200,
                 "message": "Success"
               }
Step 1 : Use the below method to register a new user. You will now have a username and password.
Step 2 : Establish server connection using the connect method.
await SDK.register(`USER_IDENTIFIER`);
The sample response will look something like below:
                  {
                     statusCode: 200,
                     message: "Success",
                     data: {
                     username: "123456789",
                     password: "987654321"
                     }
                   }
Connecting to the MirrorFly Server
Step 1 : Use the credentials you created during the registration process.
Step 2 : Connect to the server and track the connection using the connectionListener callback function.
await SDK.connect(`USERNAME`, `PASSWORD`);
You will get one of the following responses:
Step 1 : Successful connection: Approval message with statusCode 200
Step 2 : Connection failure: Execution error
Send Message
Use the below method to send a message
                           await SDK.sendTextMessage(`TO_USER_JID`,
                            `MESSAGE_BODY`);
Receive Message
In order to receive messages from other users in a one-to-one or group chat, you need to implement the "messageListener" function, which will be called whenever a new message or related event is received.
To initialize the SDK and enable this functionality, you must add the provided callback method during the initialization process.
                            function messageListener(response) {
                                 console.log("Message Listener", response);
                               }
Coming to the end, we have seen how simple and easy it is to build a chat app using Angular and MirrorFly Chat SDK. Within 5 steps, we were able to create an Angular project, integrate the SDK and establish the in-app messaging functionality. Finally, you now know how to create a fully functional Angular chat app.
We hope this tutorial has been helpful and if you have any questions or feedback, feel free to reach out to the MirrorFly support team.
Add chat features to your Flutter apps - in 10 minutes - with just a few lines of code.
Request DemoDrive 1 billion + conversations on any Android, iOS, or Web app with 500+ chat features & 100+ UI components.