Let's integrate Flutter Video & Call SDK
Quick Start#
Audio/Video Call SDKs for Flutter#
With CONTUS MirrorFly Call SDK for Flutter, you can easily add real-time call features to your client app within 30 minutes. Through our client SDK, you can initialize and configure chat into your app with minimal efforts.
Note : If you're looking for the fastest way to build your app’s UI with MirrorFly Chat Plugin, you can use our sample apps. To get our sample apps, click here
Integrate Call SDK#
Requirements#
The requirements for Android Call SDK are:
- Android Lollipop 5.0 (API Level 21) or above
- Java 7 or higher
- Gradle 4.1.0 or higher
The requirements for iOS Call SDK are
- Xcode 14.1 or later
- iOS 12.1 or later
- Swift 5.0 or later
Things To Be Noted Before You Get Started#
SDK License Key#
caution
Skip this step if you are already having your license key.
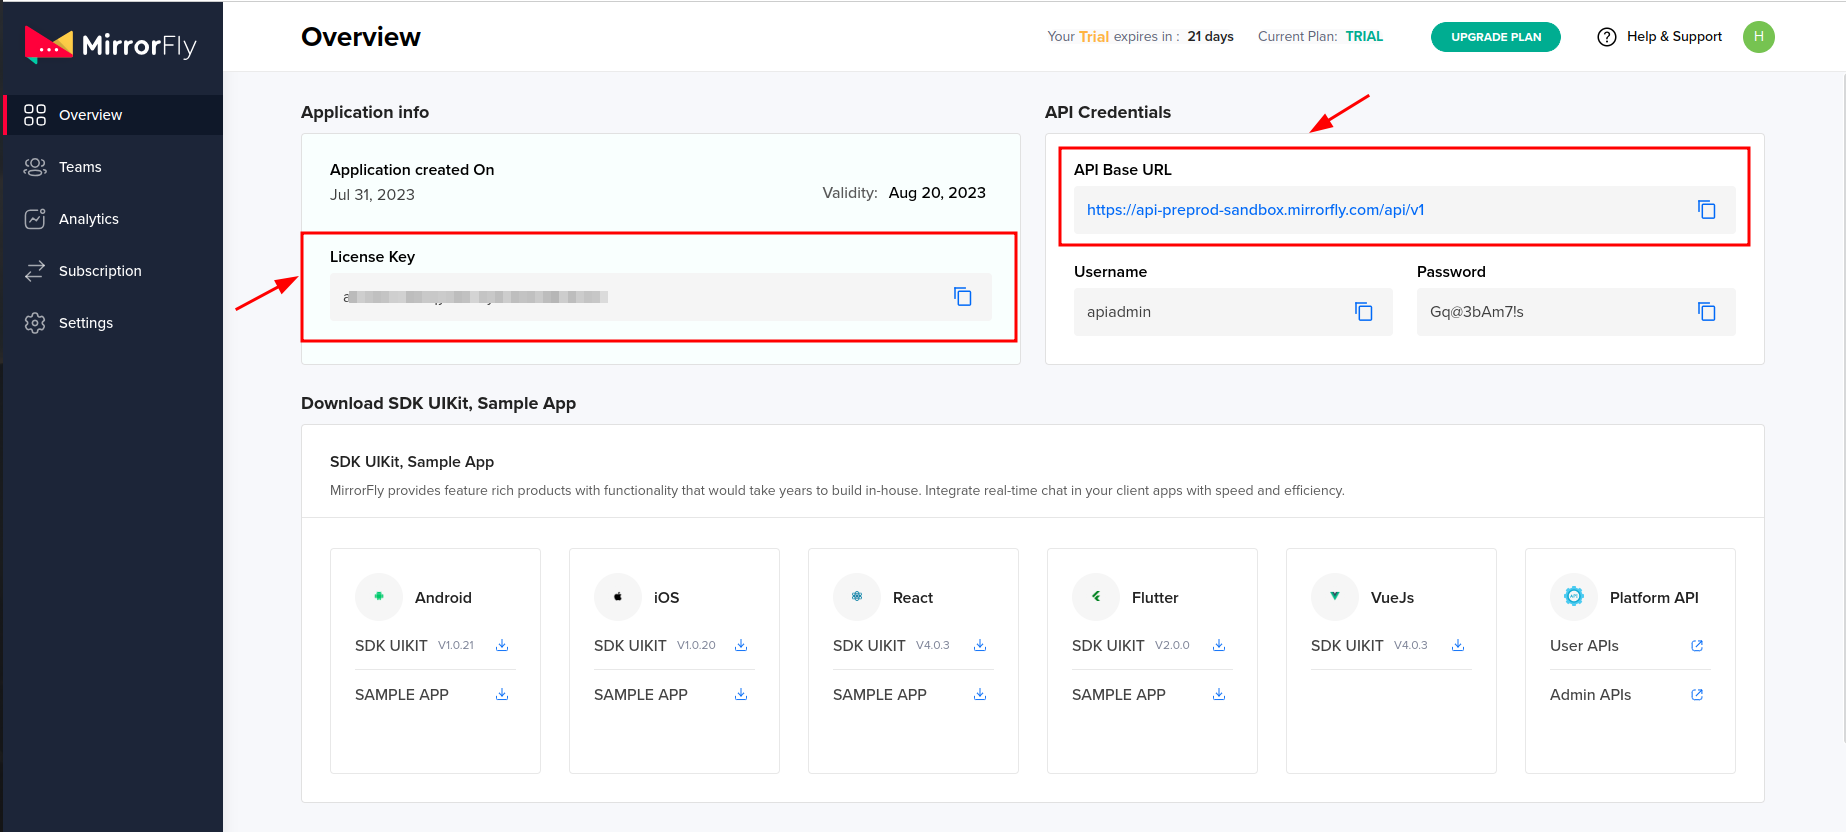
To integrate MirrorFly Call SDK into your app, you will need a SDK License Key. The MirrorFly server will use this license key to authenticate the SDK in your application.
To get the License Key#
Step 1: Sign up for a MirrorFly Account
Step 2: Log into your Account
Step 3: Get the License key from the application Info section
Getting Started#
Create Android dependency#
Step 4: Add the following to your root build.gradle file in your Android folder.
Add the following dependencies in the app/build.gradle file.
Create iOS dependency#
Step 5: Check and Add the following code at end of your ios/Podfile
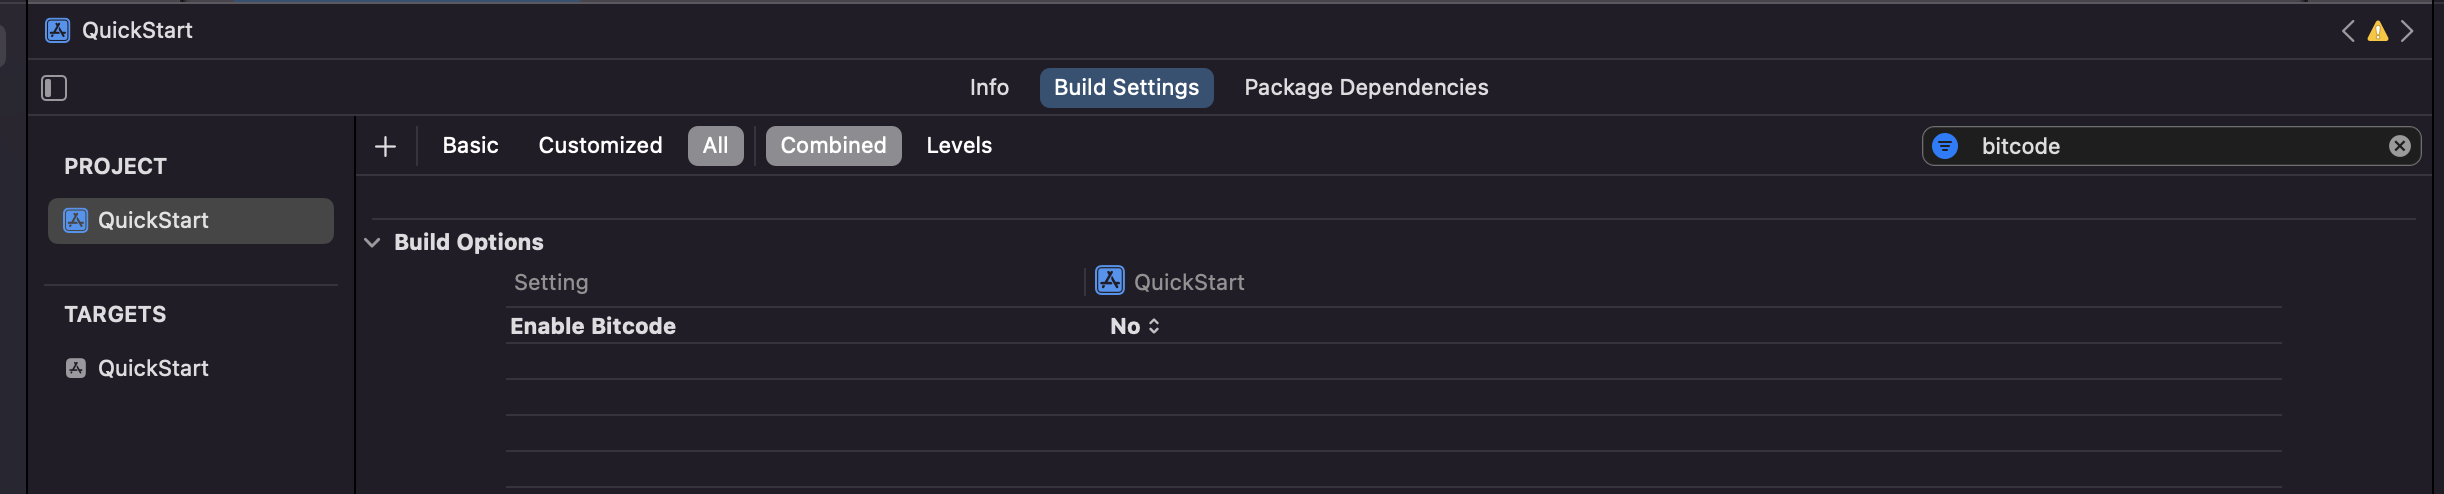
Step 6 : Now, disable the bitcode for your project
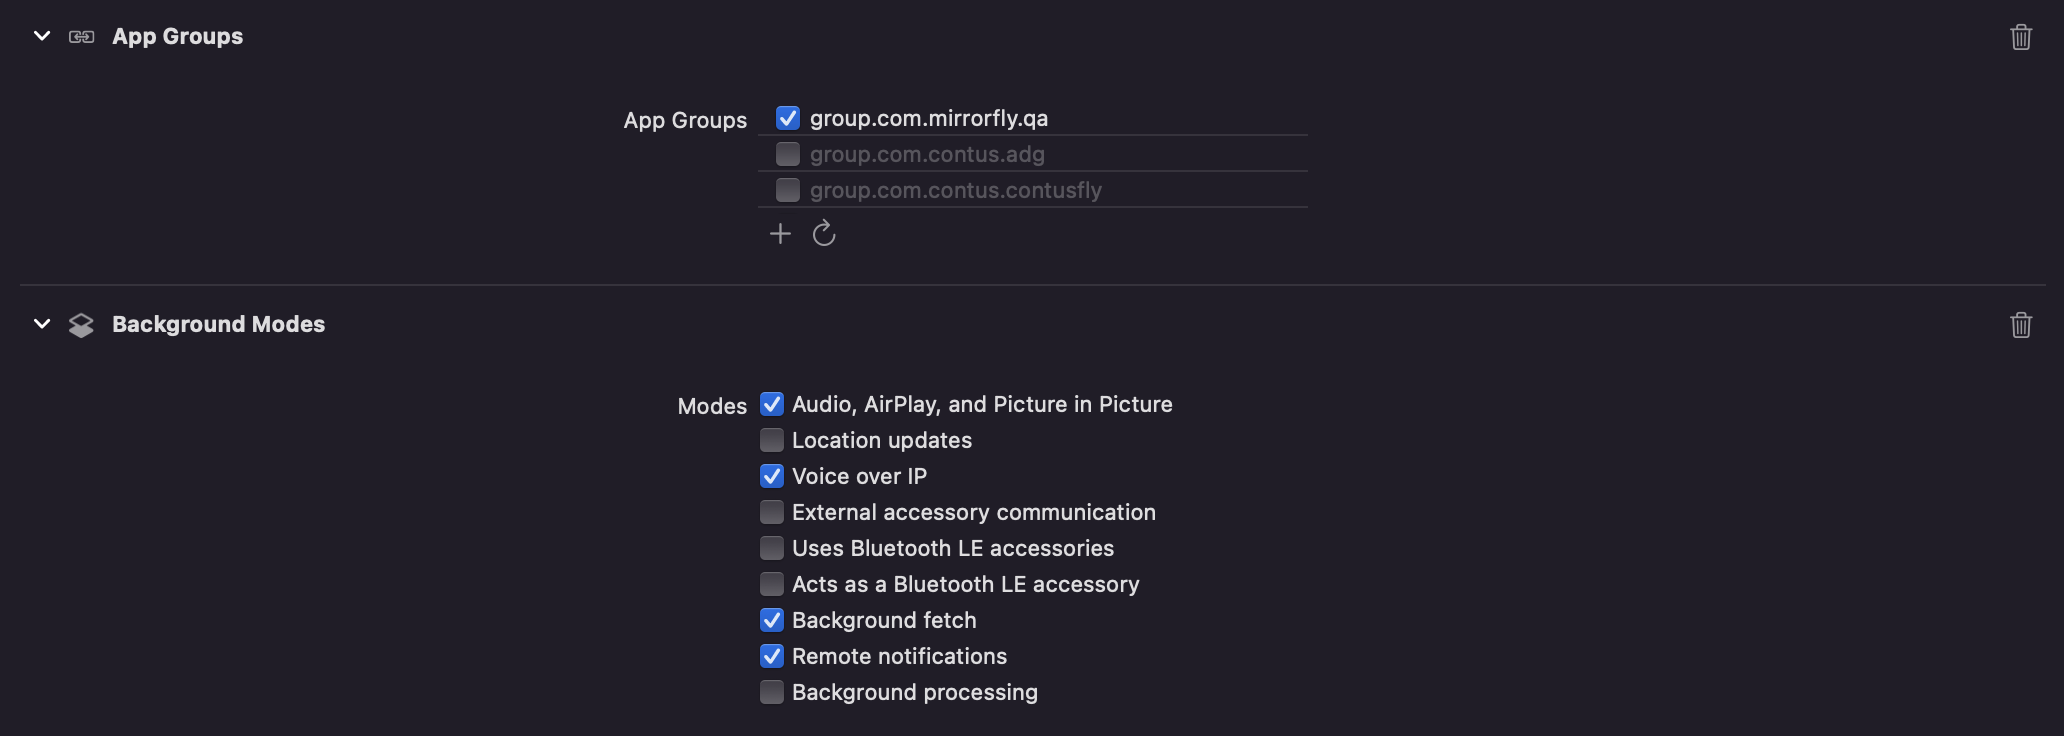
Step 7: Now, enable all the below mentioned capabilities into your project.
| Capabilities |
|---|
| App Groups |
| Background Modes |
Now, go to the background mode and enable the below given modes | Background Modes | | -------------------| |Audio,Airplay, and Picture in Picture | |Voice over IP | |Background fetch | |Remote notifications |
Create Flutter dependency#
Step 8: Add the below dependencies in pubspec.yaml.
STEP 9: Run flutter pub get command in your project directory. You can use all classes and methods just with the following import statement
Initialize MirrorFly Plugin#
To initialize the plugin, place the below code in your main.dart file inside main function before runApp().
Chat init Function Description#
| Function | Parameter Type | Description |
|---|---|---|
| licenseKey | String | License key is required to proceed with registration |
| iOSContainerID | String | Create App groups and assign the obtained group container id. Plugin uses this string to create the path for the local storage. |
caution
The base URL must have the Http/Https protocol which must be closed with a ‘slash (/)’, if not an exception - a bug message will pop up.
Note: While registration, the below
registerUsermethod will accept theFCM_TOKENas an optional param and pass it across.The connection will be established automatically upon completion of registration and not required for seperate login.
| Argument | Type | Description |
|---|---|---|
| userIdentifier | String | A unique Id to Register the User. We accept only the AlphaNumeric String |
| token | String | A registration token that is generated by FCM Plugin for the user's app instance to send message for free |
| isForceRegister | Boolean | default value true, provide true to force the logout of the old session if the registered user has reached the maximum no of multi-sessions or provide false to allow registration till the maximum no of multi-sessions |
Note : After registering, make sure to update the profile of the registered user Update Profile.
Note : It is recommended to disallow users to backup an app if it contains sensitive data. Having access to backup files (i.e. when
android:allowBackup="true"), it is possible to modify/read the content of an app even on a non-rooted device.
caution
If FORCE_REGISTER is false and it reached the maximum no of multi-sessions then registration will not succeed it will throw a 405 exception, Either FORCE_REGISTER should be true or one of the existing session need to be logged out to continue registration.
Terminology#
Some of the most common terminologies used in MirrorFly Plugin with description
| keyword | Explanation |
|---|---|
| userID/userBareID | Unique ID assigned for each user Ex: 12345678 (any alphanumeric). The below characters is not allowed in userId: U+0022 (") U+0026 (&) U+0027 (') U+002F (/) U+003A (:) U+003C (<) U+003E (>) U+0040 (@) userID should follow below specification: https://xmpp.org/extensions/xep-0106.html |
| userJid (or) JID | userID+@+domain of the chat server Ex. 12345678@xmpp.chatsystem.dev.contus.us |
| groupID/groupBareID | Unique ID assigned for each group Ex: group123456 (any alphanumeric). GroupJID = groupID +@mix.+domain of the chat server Ex: group123456@mix.xmpp.mirrorfly.dev.contus.us` |
caution
To make and receive a voice/video call, Microphone and Camera usage permissions were required. Make Sure those permissions are granted
caution
If one to one call feature unavailable for your plan then it will throw 403 exception.
From Android 12, ensure that
android.permission.BLUETOOTH_CONNECTandandroid.permission.READ_PHONE_STATEruntime permissions are granted for your app for seameless audio routing and gsm call handling. If theandroid.permission.BLUETOOTH_CONNECTpermission is not granted, call audio will not be routed to BT Headset even though it is connected. If theandroid.permission.READ_PHONE_STATEpermission is not granted, gsm call related functionalities will not work in sdk.
Note: From Android 13, CallSDK need below permission to show ongoing call notification.
Make a Voice Call#
To make a one to one voice call, call the below method.
| Argument | Type | Description |
|---|---|---|
| USER_JID | String | Jid of another registered user |
Receive a call#
Call SDK will take care of receiving and processing the received call payload and triggering the CallKit for iOS and Incoming Call Intent for Android is presented, if you are connected to the server in foreground state.
Once the Call is being presented with Accept/Reject Call buttons, we can either choose to attend or reject the call. If we attend the call the below event listener onCallStatusUpdated will be triggered, and the status will be of the case Attended.
| Argument | Type | Description |
|---|---|---|
| callMode | String | For this callMode OneToOne or groupCall will be returned from SDK |
| userJid | String | For this userJID will be returned from SDK |
| callType | String | For this callType Video or Audio will be returned from SDK |
| callStatus | CallStatus | An enum class defines the current status of the call |